- ITEM NAME: BORVEL
- DESCRIPTION: Elevate your construction business with Borvel, a premium WordPress theme designed for construction and building companies. Featuring a sleek, modern design, Borvel offers customizable layouts, project showcases, and client testimonials to highlight your work. With seamless integration of essential plugins, responsive design, and easy-to-use page builders, Borvel ensures a professional online presence. Optimize your site for search engines and enhance user experience with Borvel's cutting-edge features. Build trust and attract clients effortlessly with Borvel.
- AUTHOR: THEMEARK
- CATEGORY: builder, building, construction company, engineering, factory, home renovation, industrial, industry, maintenance services, renovation.
After the payment is done, while downloading you will find several options and make the right choice according to your needs. You will find:
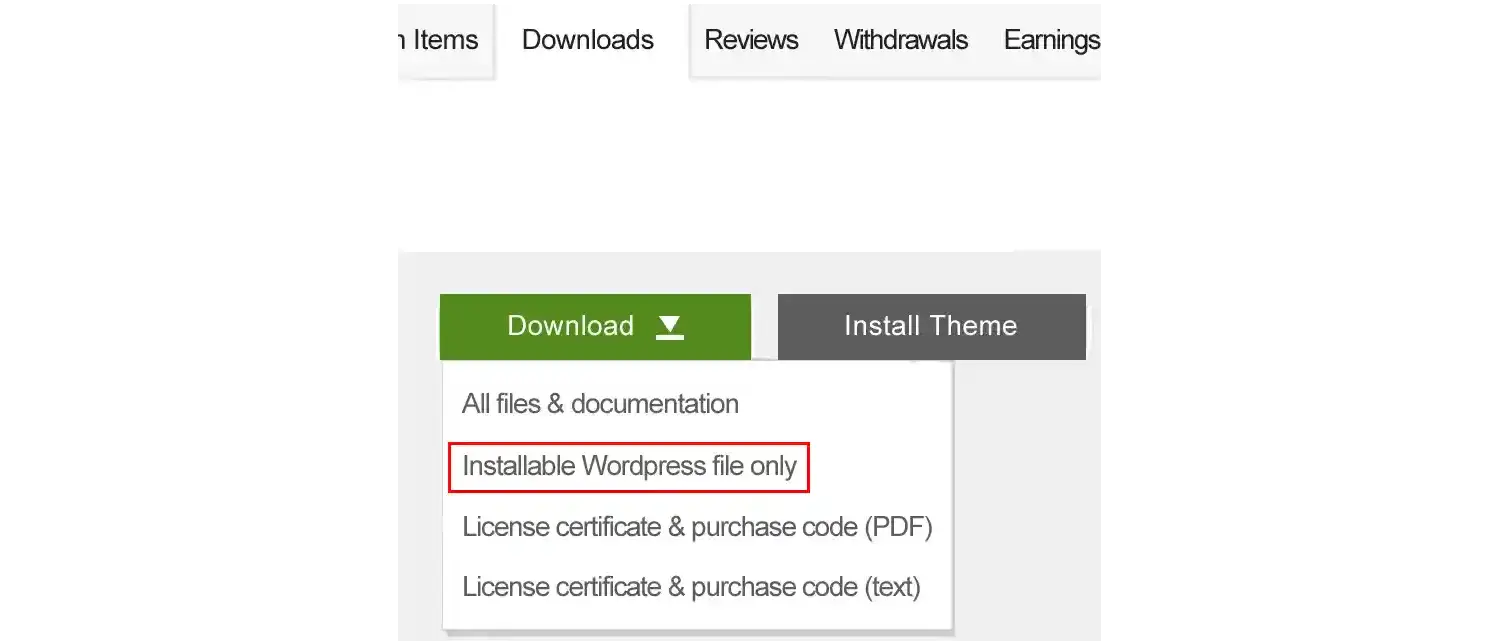
- 1. All Files & Documentation
- 2. Installable Wordpress file only
- 3. License certificate & purchase code (PDF)
- 4. License certificate & purchase code (text)
If you intend to do a setup only, and don't need other additional things, choose “Installable Wordpress file only” option to directly download the .zip WordPress-themed file. If you have downloaded the full package, by clicking "All Files & Documentation", extract it and choose the item name zip.
Before proceeding, make sure your server meets the required config. Then you can upload the theme zip file from Appearance > Themes > Add New Theme and activate it. When the theme is activated, it will ask for “Begin installing plugins”. You can install and then activate the plugins. As they are required plugins, don't skip them. Now you can proceed to “Demo import”
Please note that, after installation of the theme and required plugins & theme, the website will start with empty pages. There will be no pages/posts or any other visual item. You have to import content (Pages, Posts, Menu and other Elements) which you saw on Themeforest preview on your WordPress via demo import. It can be done in two ways:
- 1. One Click Demo Import
- 2. Manual XML Demo Import
One Click Demo Import
One Click Demo Import automatically imports all the required files. Users do not have to instruct anything to the importer. Before proceeding, we request
you to check the requirements of the theme because anything lower than the theme's requirements will cause several issues. Users may find that the Demo
import is 100% done but pages / posts may be non-editable, missing sections and many other problems. To Import via "One Click Demo Import" please goto
Appearance > Theme Import / Demo Import.
It will open the welcome page and ask for "Start". This page will display some server status, please click "Start". Now, it will give you the option to
install child theme. It is an optional choice. If you didn't install the required plugins on "installation" stage, you can install them again. Otherwise,
you may skip. On this page, One Click Demo Import will start to import demo files automatically. Please click "Import". Now, the Import task has been started
and will display progress in %. This will require some time (more than 3–4 minutes depending on theme size, server configuration). If you notice the progress
bar is acting abnormally, like going backward - forward or sudden jump to 99%, the chance is that your server Configuration is lower than required, which is
creating issues with the One click Demo importer,please check the server configuration. After successfull demo import WordPress website will be ready.
Manual XML Demo Import
On some occation, users may prefer to import the Demo files manually. It can be done by importing a XML file provided with theme packege
(Download the full packege). Similar to One Click Demo importer, before proceeding, we request you to check the requirements of Theme because
anything lower than Theme requirements will cause several issues.
First, activate the Wordpress importer from Tools > Import > Install Now . By default, it is turned off.
Now, click the "Run Importer". Click "Choose File" to upload XML file (Packed inside theme file zip), Locate the .xml File, proceed to "upload file and import".
On this page, it will ask which user should be assigned for imported posts / pages. Also tick mark "Download and import file attachment" and click "Submit".
After importing Demo contents, It will show a page like this with a massage "All Done, Have Fun"
Structure
Menubar, also called as Navigation bar, holds the Main Page/posts Link for visitor's quick navigation.
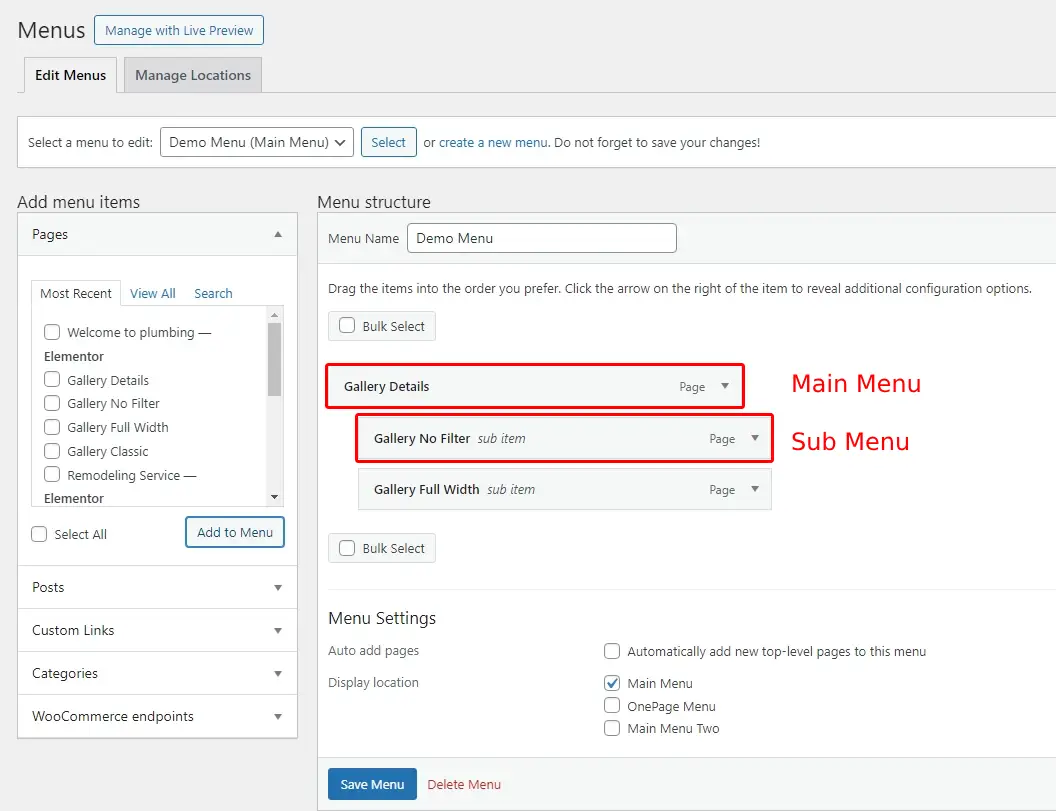
A Parent / Main Menu Bar link can have a sub menu link and that sub menu can also hold another sub menu too. It looks like below on the Wordpress panel:
Type
There are two types of Menu Bar used:
- General Menu
- OnePage Menu.
OnePage Menu is a special menu where the user does not go on the other pages of the website, they stay on a single page but navigate to different sections of the page by clicking
links on the OnePage menu.
Below is a General Menu Bar which is linked to another page of the website.
Creating Menu:
To make a New Menu, click “create a new menu”, give it a name, Tick mark which type of Menu you want, generally it should be “Main Menu” but if you want to use for
One page, you can name it "One Page Menu" or whateever you want. Now click “Create Menu”.
Now let's add some links to it. There are several options to put links on Menu. You can insert from:
- Recent Post / Pages
- Posts
- Custom Links
- Categories
- Woocommerce endpoints.
When selection is done, hit the “Add to menu” and they will be added on the right side as Menu.If you want to make a sub menu, it can be done easily. Just Drag the
Menu to the right side and it will look like below “Sub Menu”.
One Page Menu:
One page manu allows you to jump into any section of a page.
Goto the section you want to link to, click on the section > advanced > CSS ID and give it a name (let's assume onepage_about). When all the sections have CSS ID,
goto Menu page from Appearance > Menus > and provide a link to the CSS ID. The link will be like #onepage_about.
The header, footers, sidebar can be set in two ways. A general setting for the full website from "Theme Panel" or "individual setting" for per page.
Header (Theme Panel Setting)
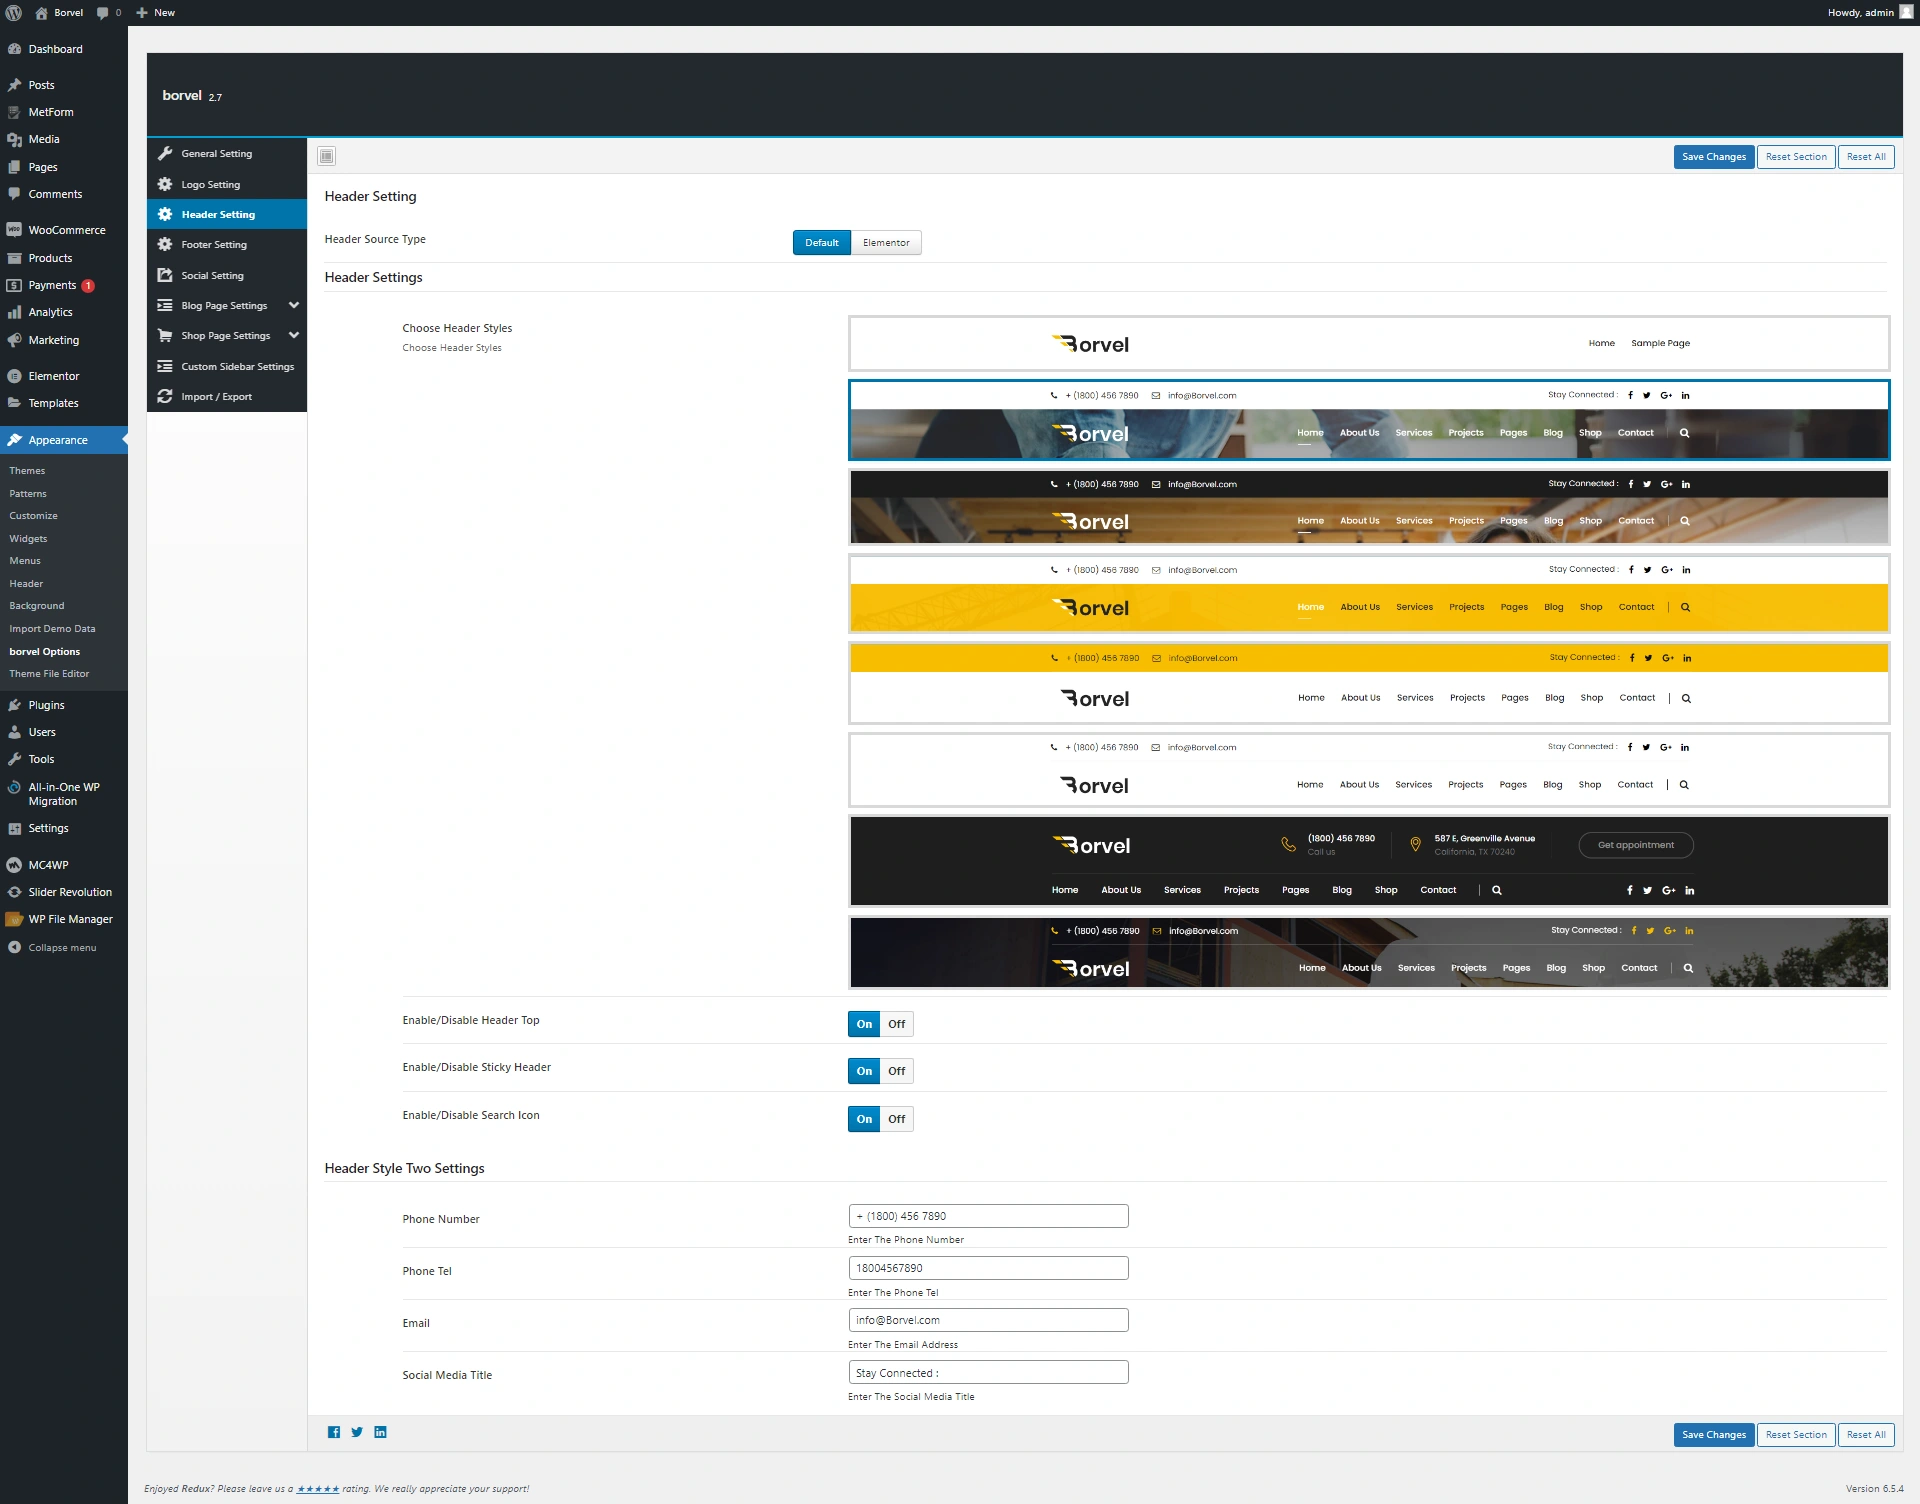
From the Theme Panel, from "Header Setting", we can set the default header setting. There are multiple header styles and you can choose which suits your need.
Footer (Theme Panel Setting)
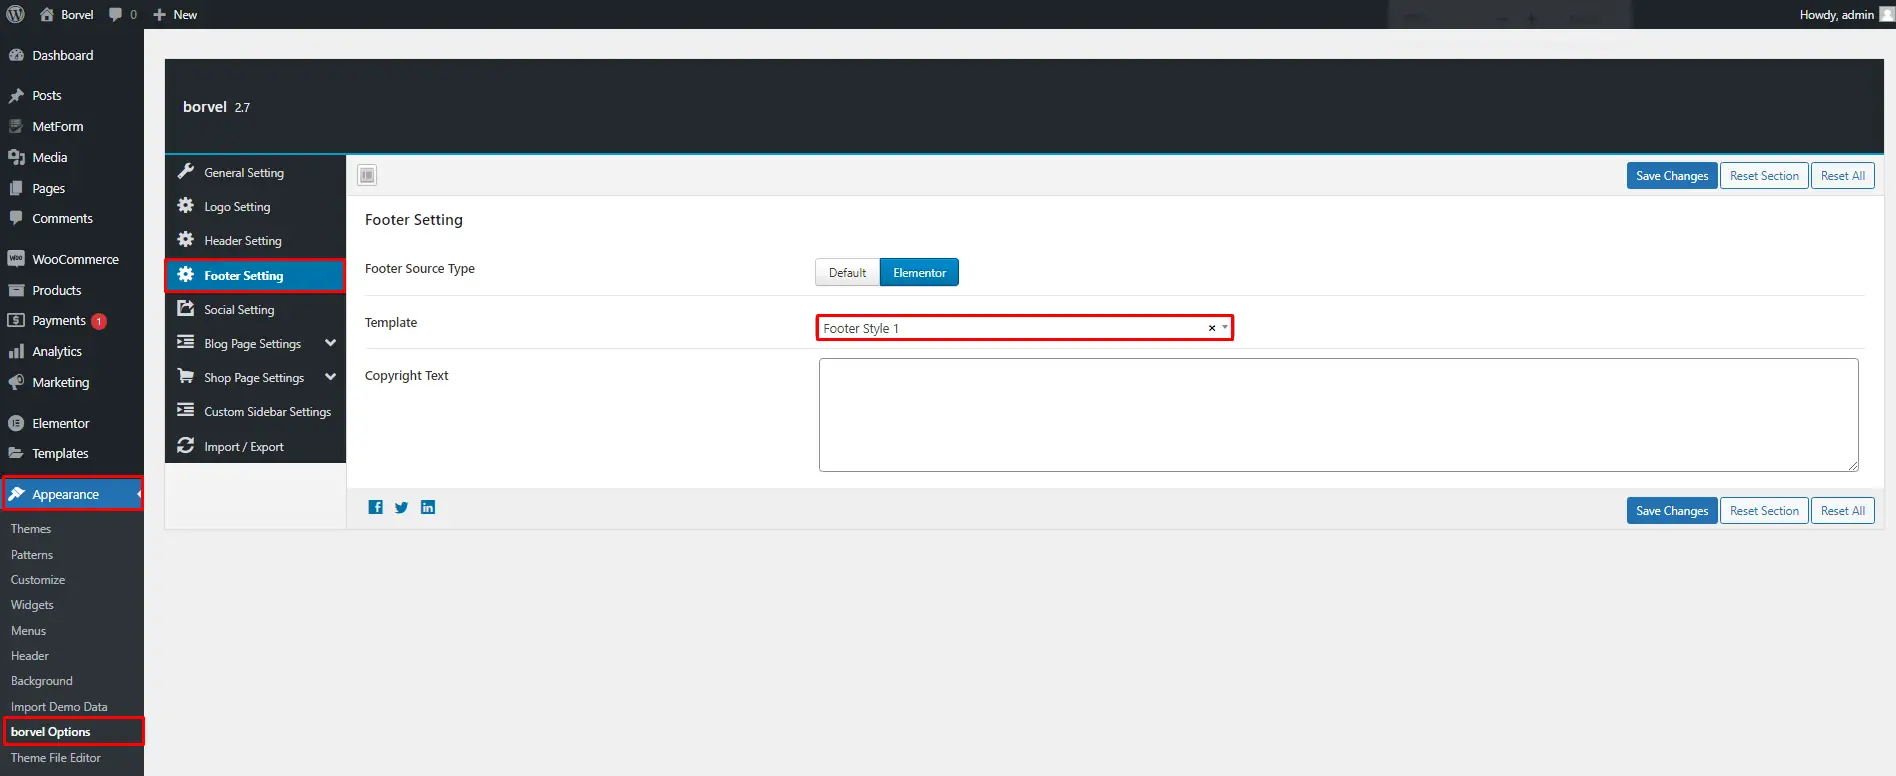
Just Below the "Header Setting" on left, "Footer Setting" can be found. On Footer settings, you can set other footer styles (if any) and insert copyright text. alongwith other additional options.
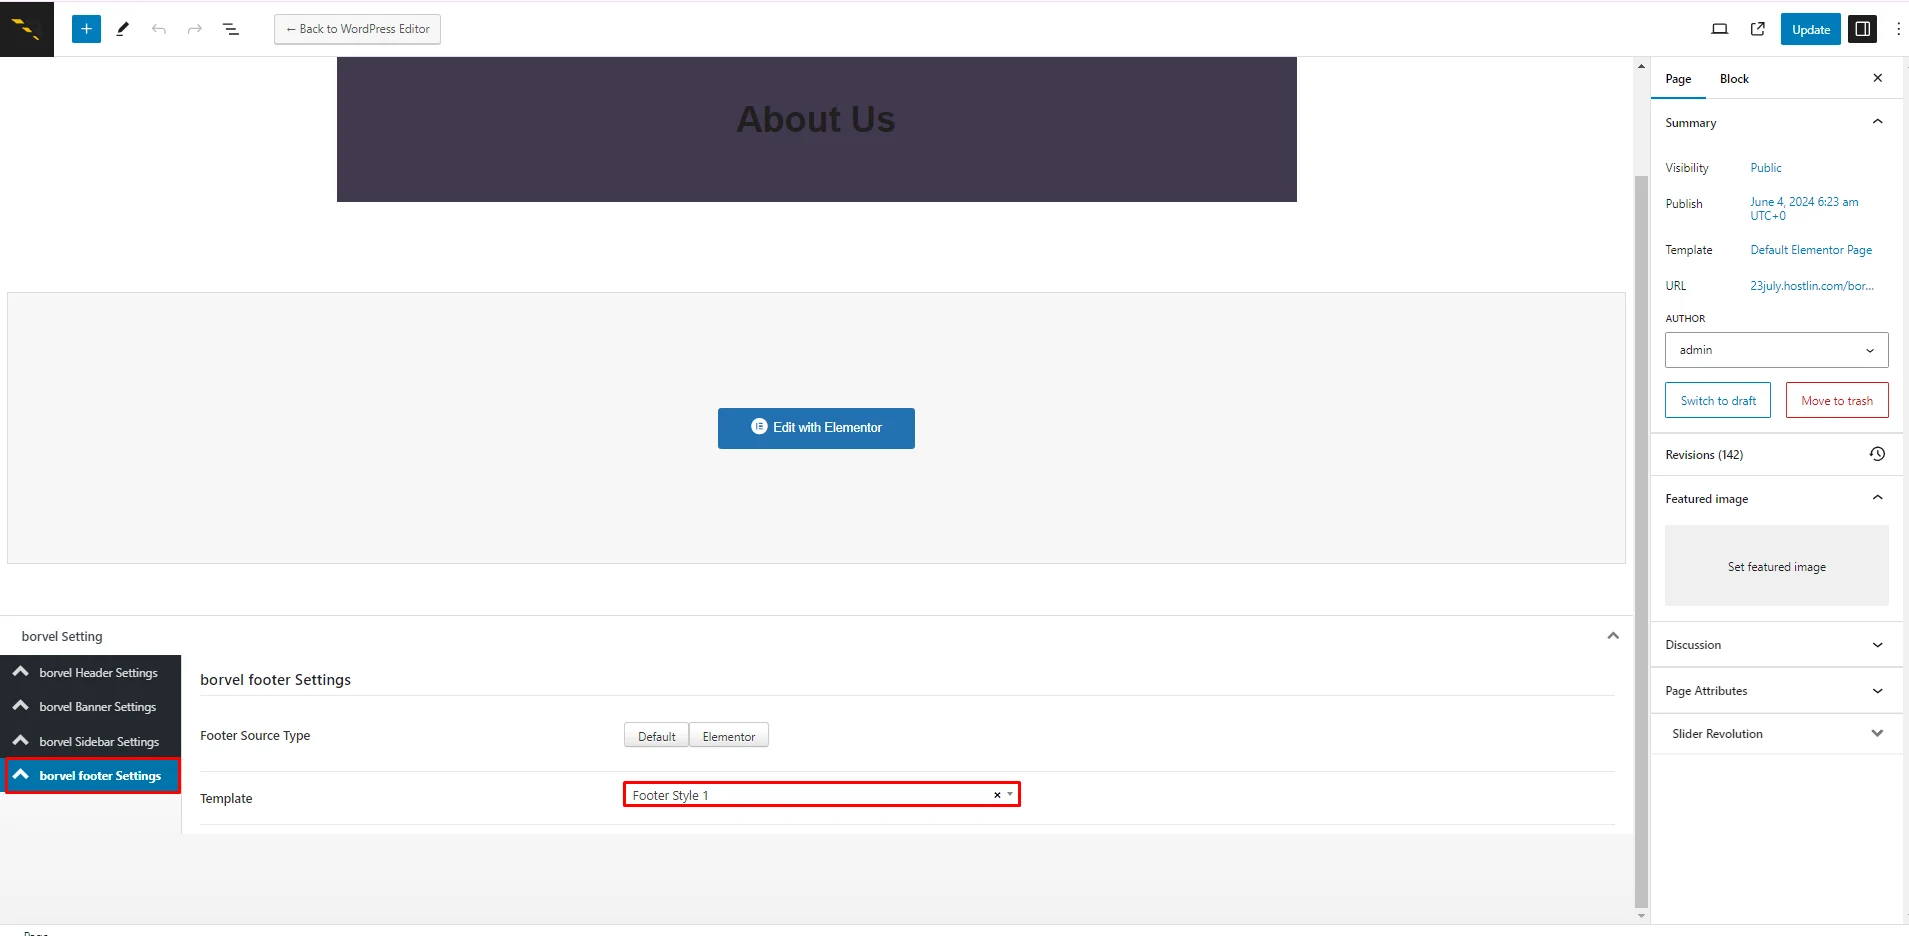
Header, Footer Individual Setting
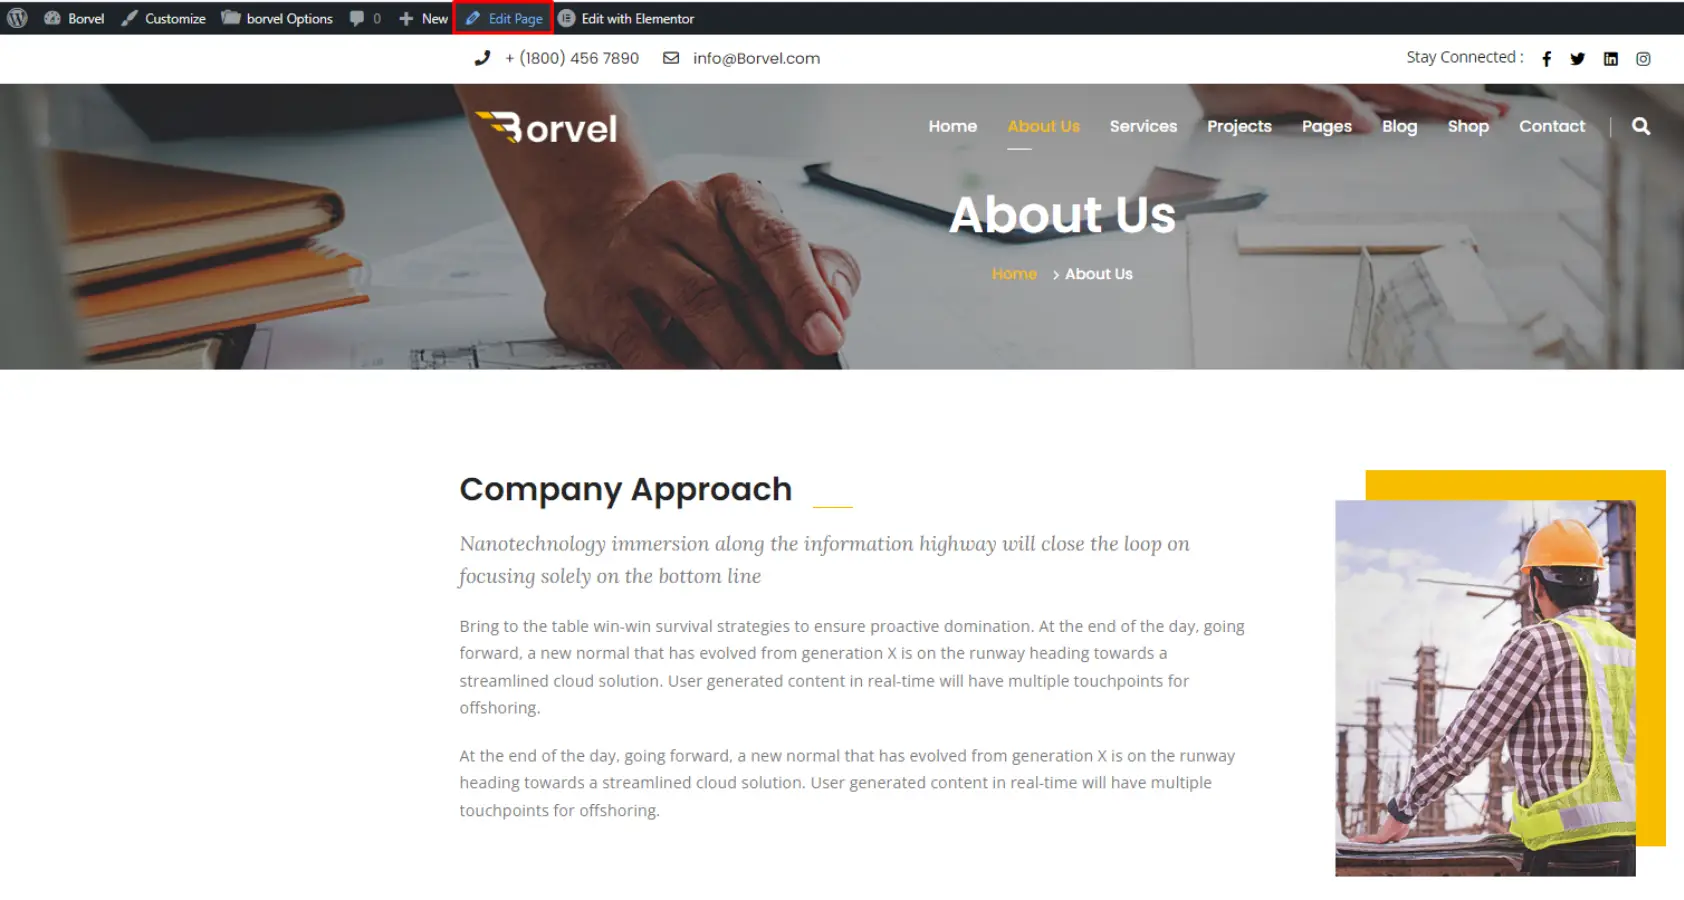
If you want to control the Header/Footer area of Post/Pages individually instead of globally setting, please follow this. Click "Edit Page".
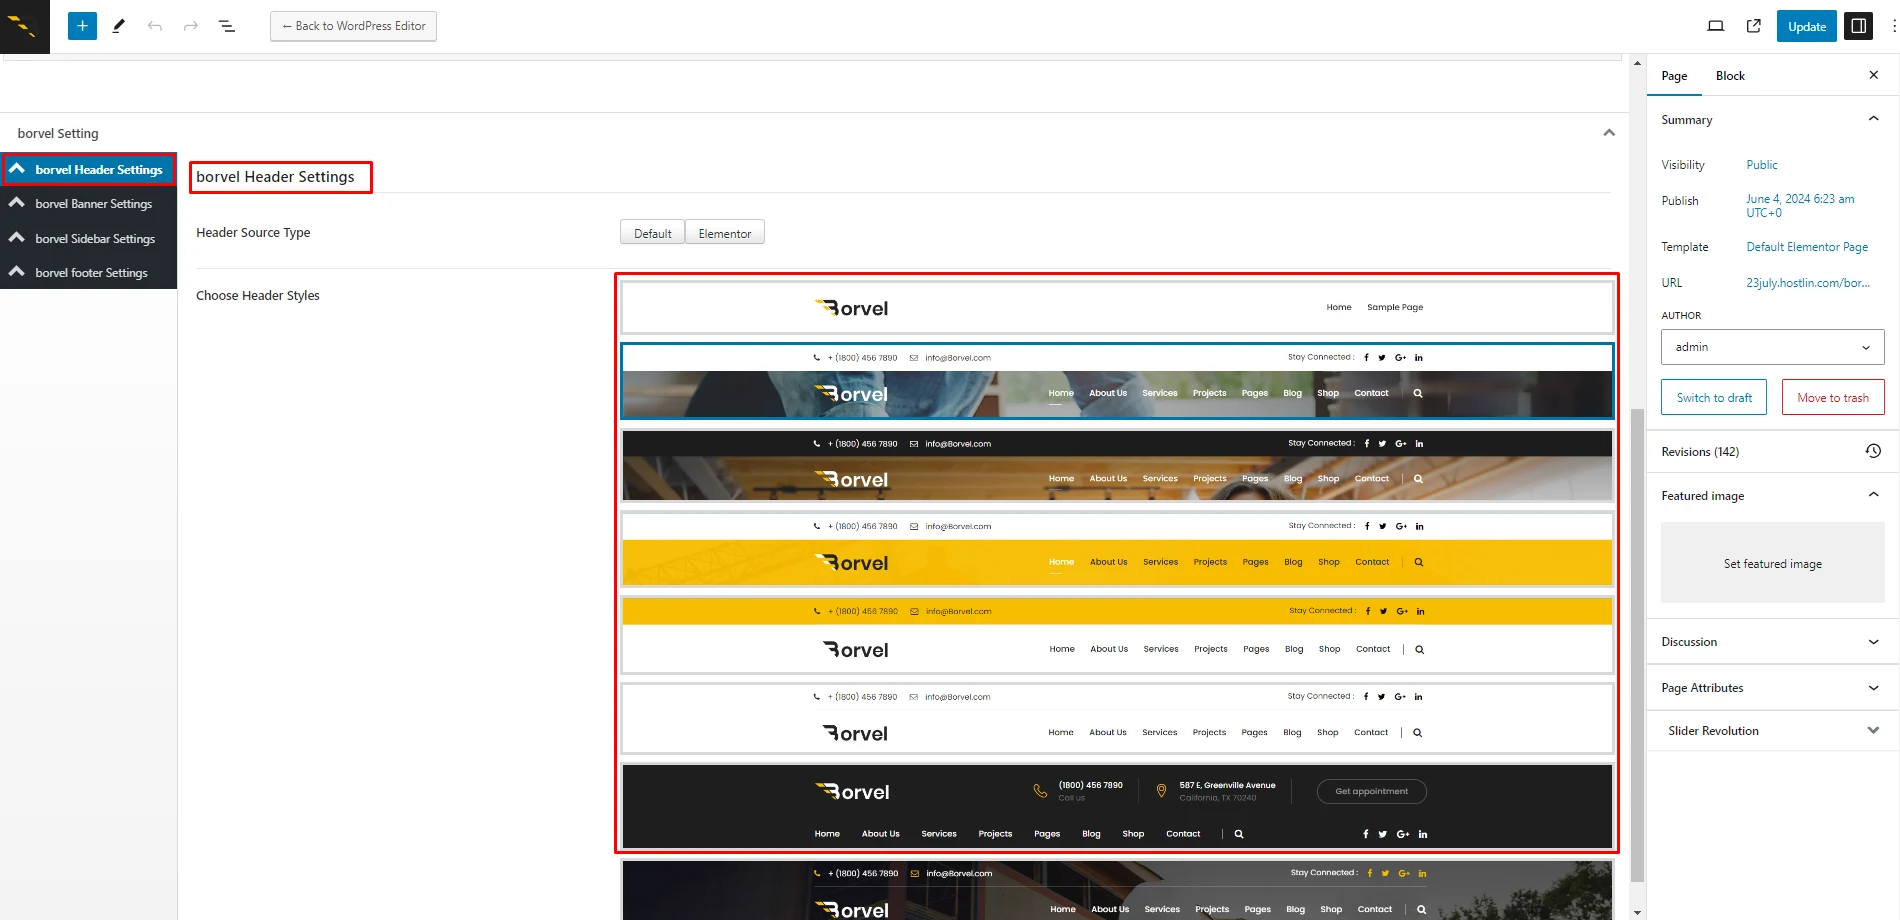
On "Borvel Header Settings" you will find the Headers style as found on the theme panel, but difference is here it will be applied only on this page/post.
Posts Global settings can be applied from Theme panel.
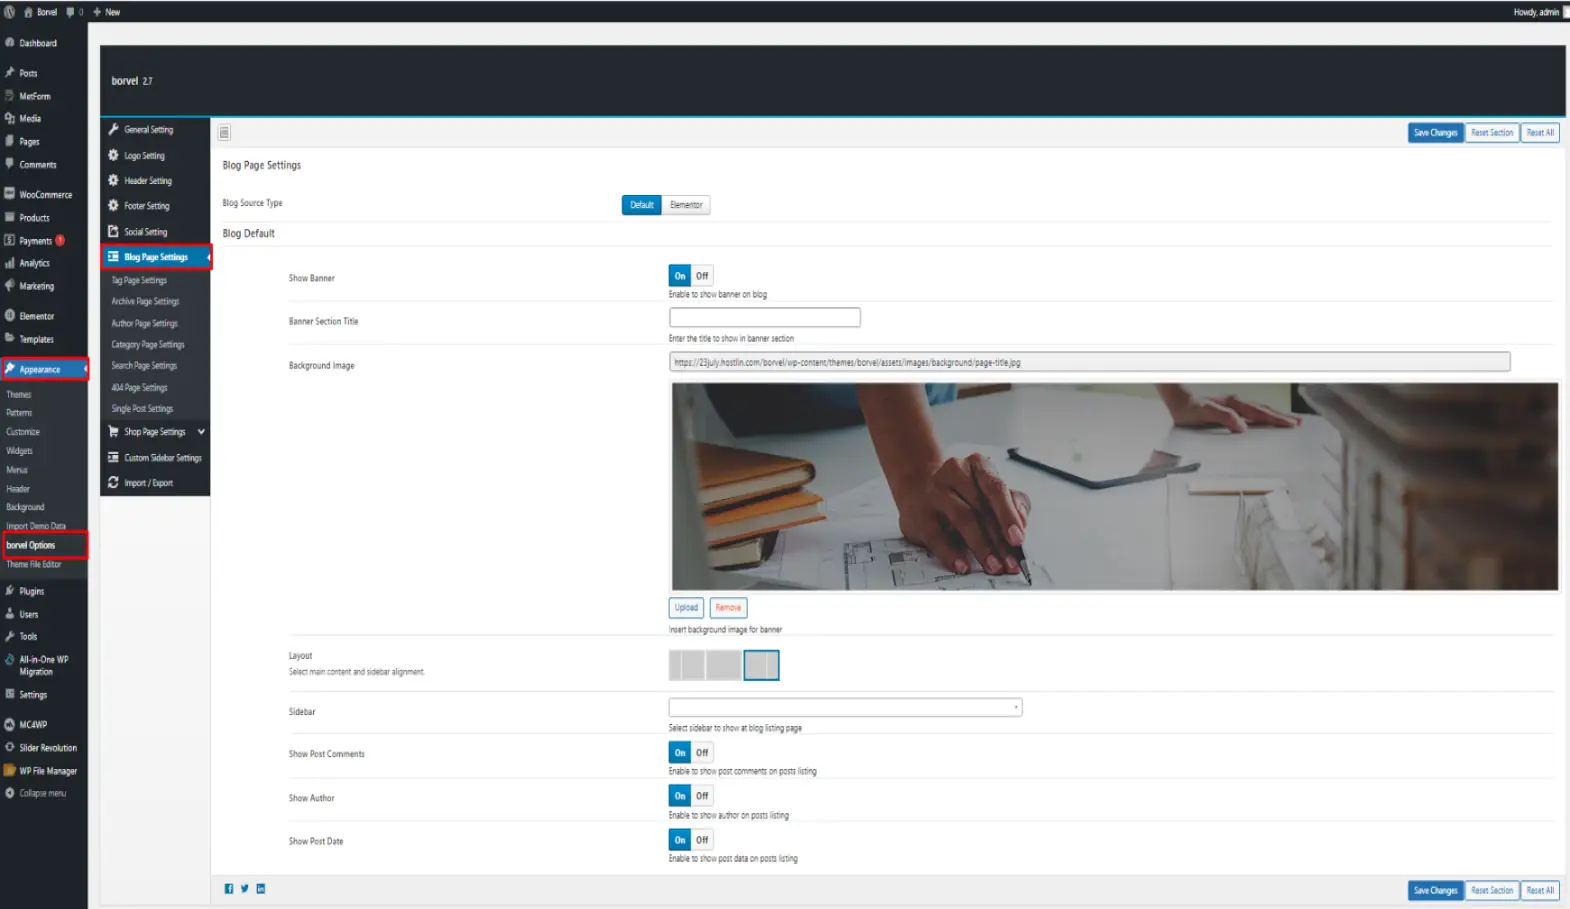
There are two options: Blog Page Settings, Single Post Settings
Blog Post Settings
From here you can set the pages Layout globally: Left Sidebar, Right Sidebar or Single Page. Next, you can additionally assign any widget with the sidebar and then turn off Comment, author, post on next options.
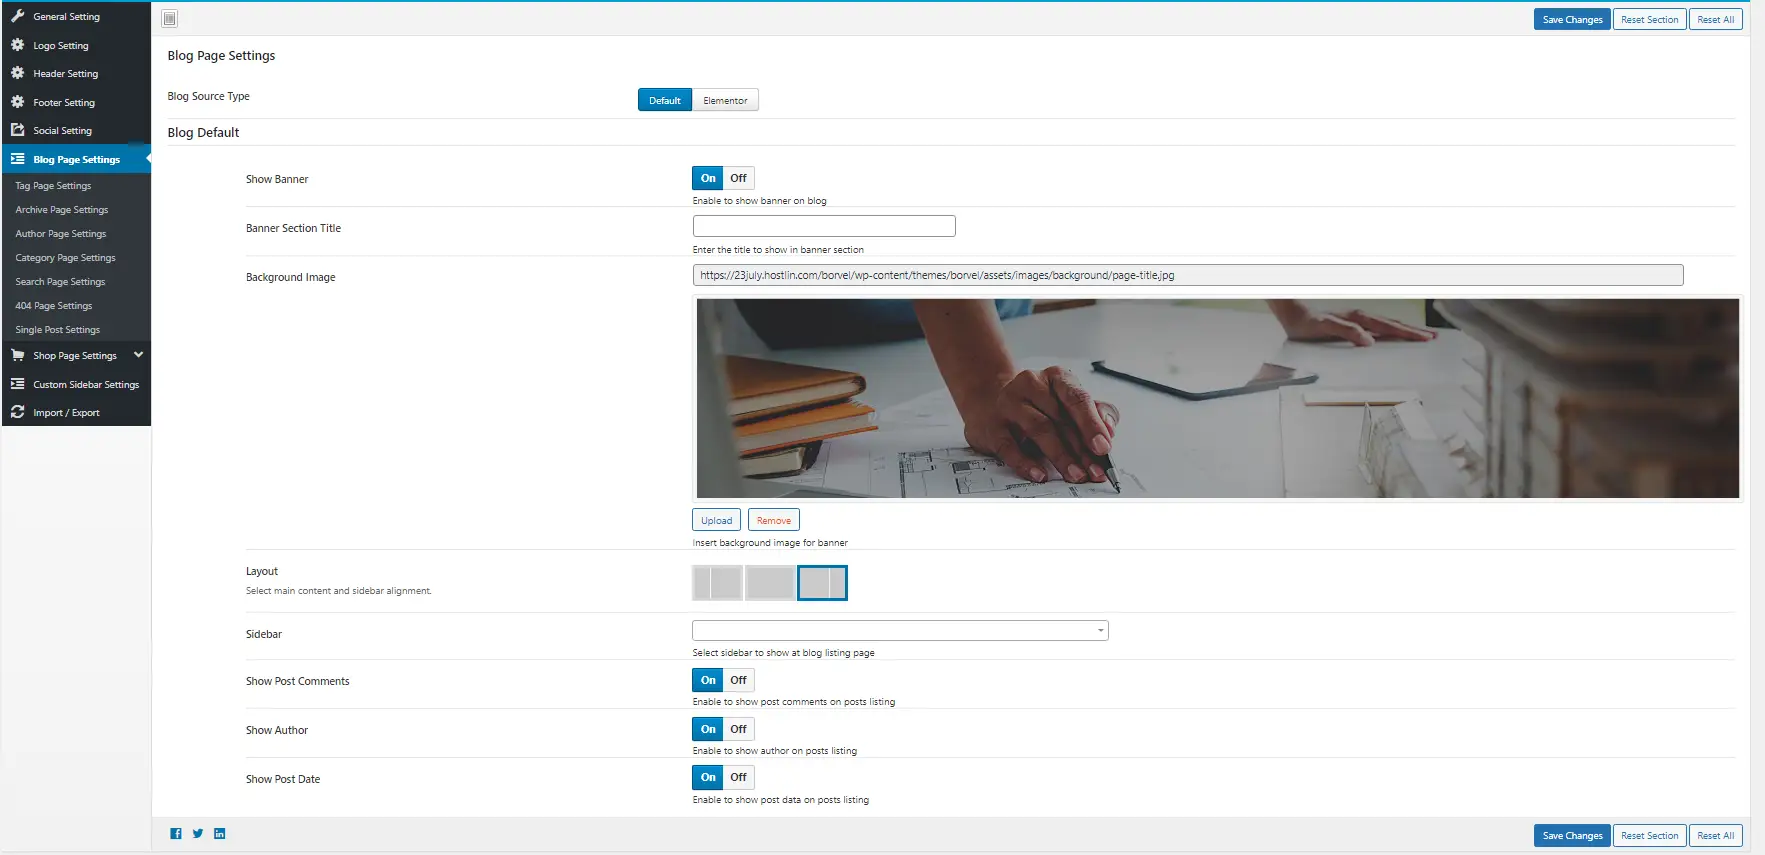
Single Post Settings
Single Post Settings are also similar to previous one except some social functionality
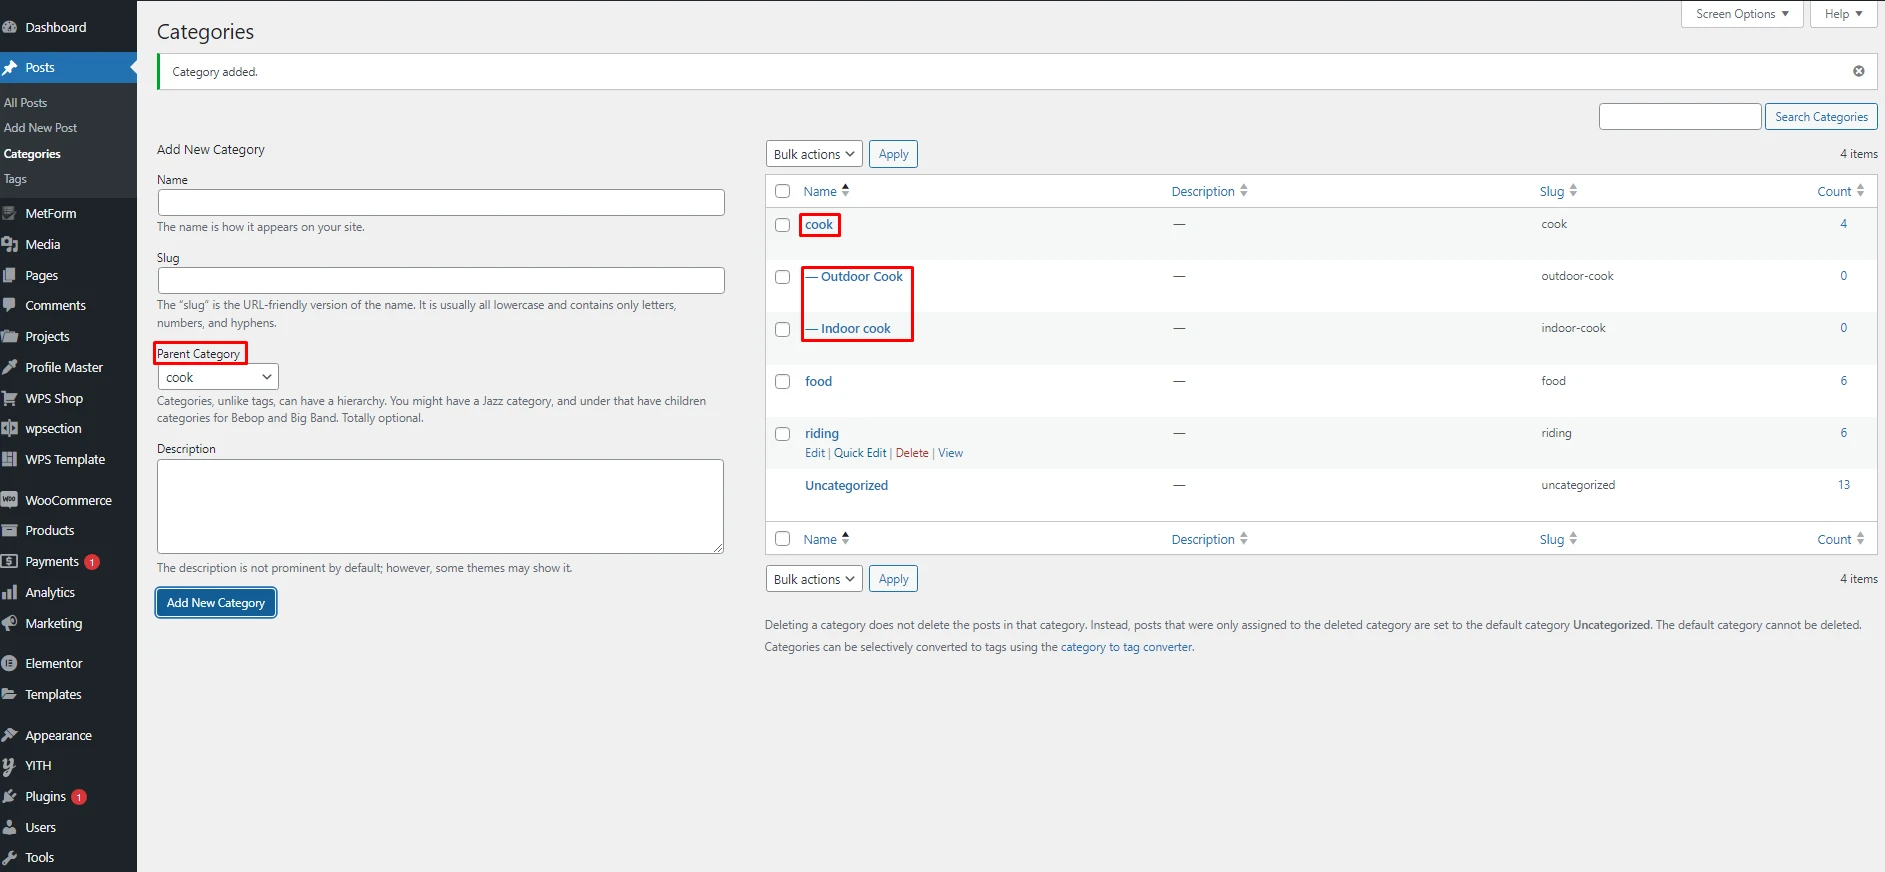
Categories
Categories provide a highly convenient method for organizing Posts. Categoreis are set as Parent category old Child category (sometime child category is called as sub category). You can find Category settings here:
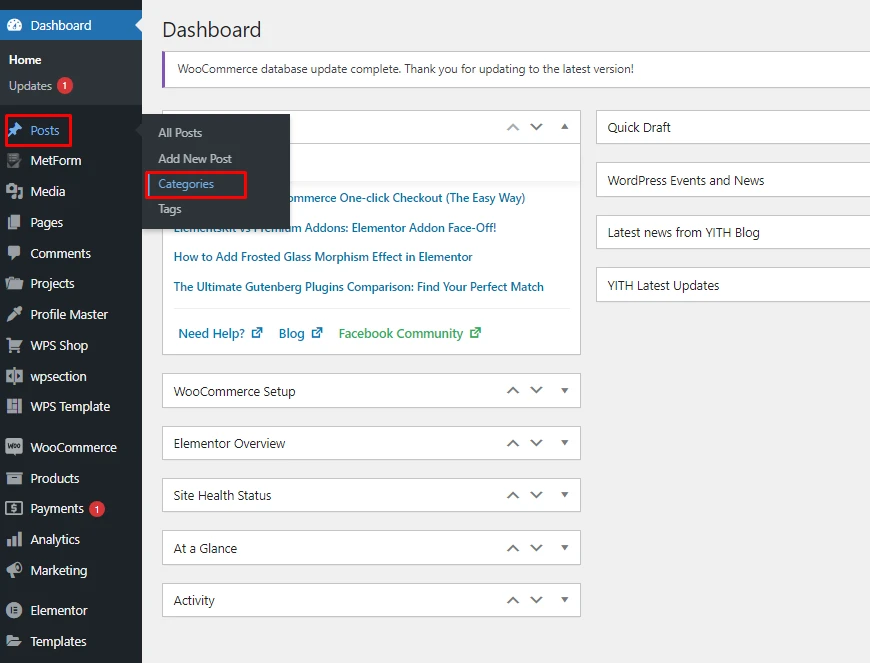
You can set Child Categories under a Parent category
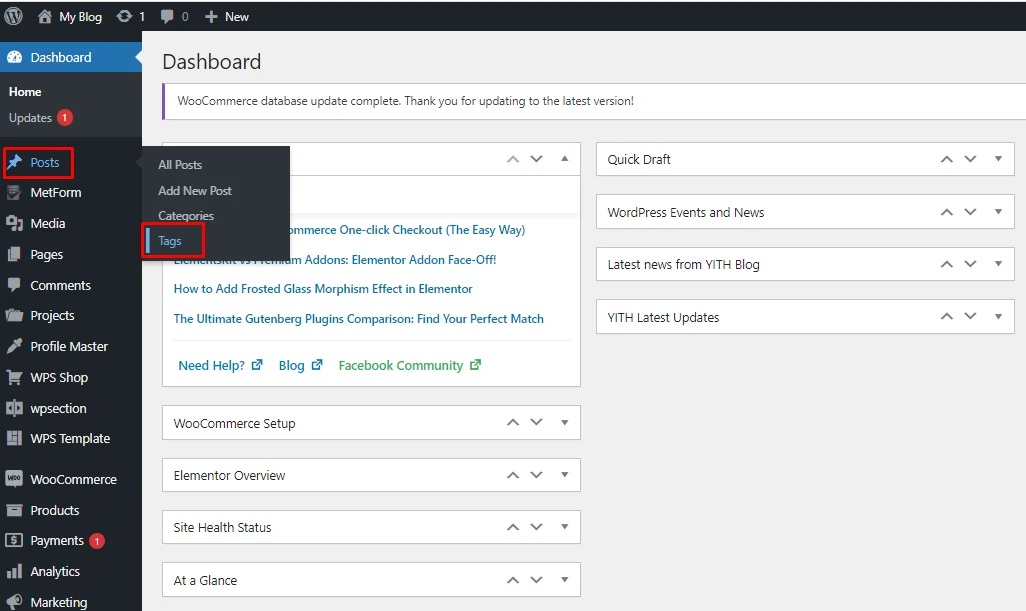
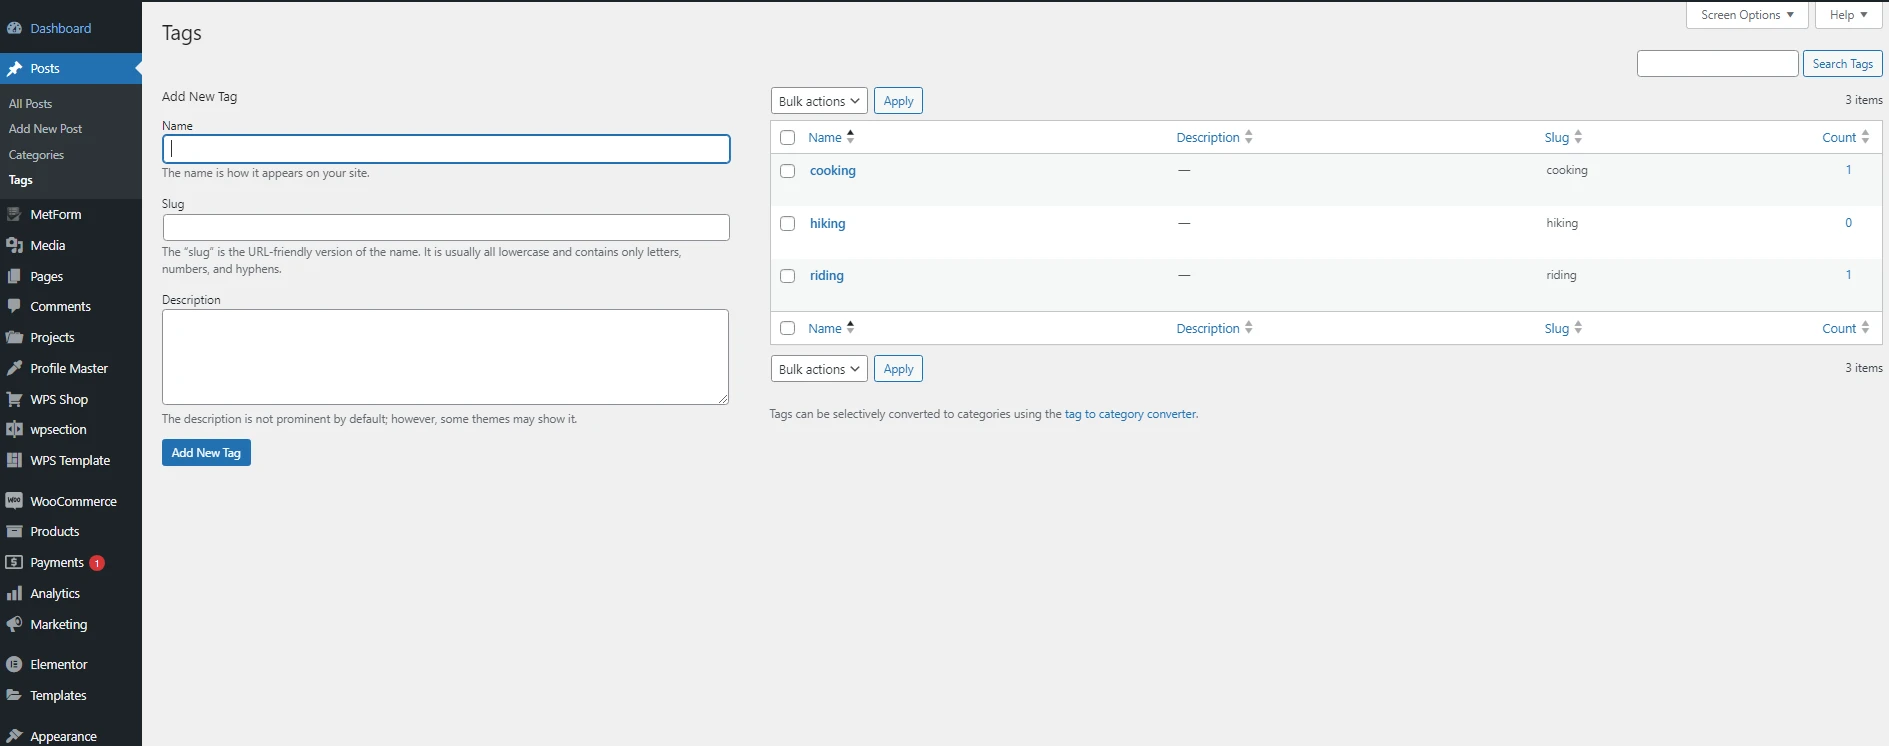
Tags
Tags are also used to categorize posts but tags are much more specific. Categories are base level classification on whole item where tags can be used on per posts specific parts. A Cooking website can have category of Inddor , Outdoor cooking but it can have tags like fried, boiled, any brand. Tags does not have child options as like Categories.
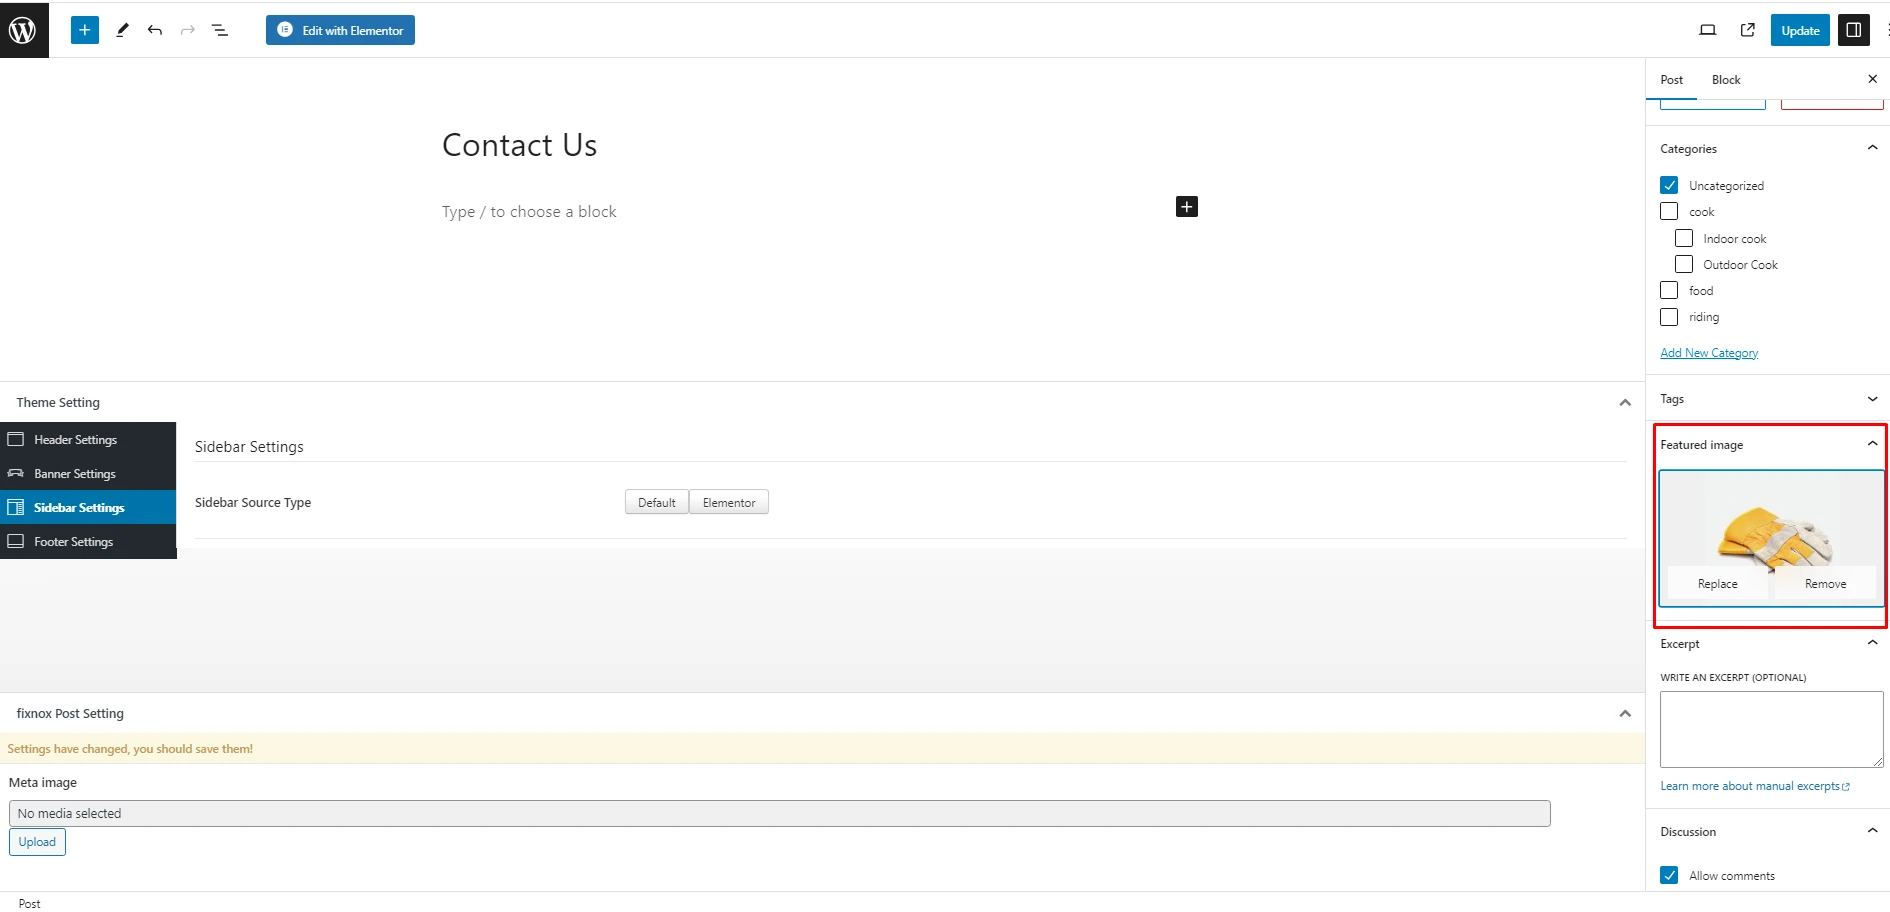
Featured Image
Featured images for post can be set from two different way. First way is to click any post "Edit" button which will bring below screen. On the right Side you will find a block for upload the "featured image".
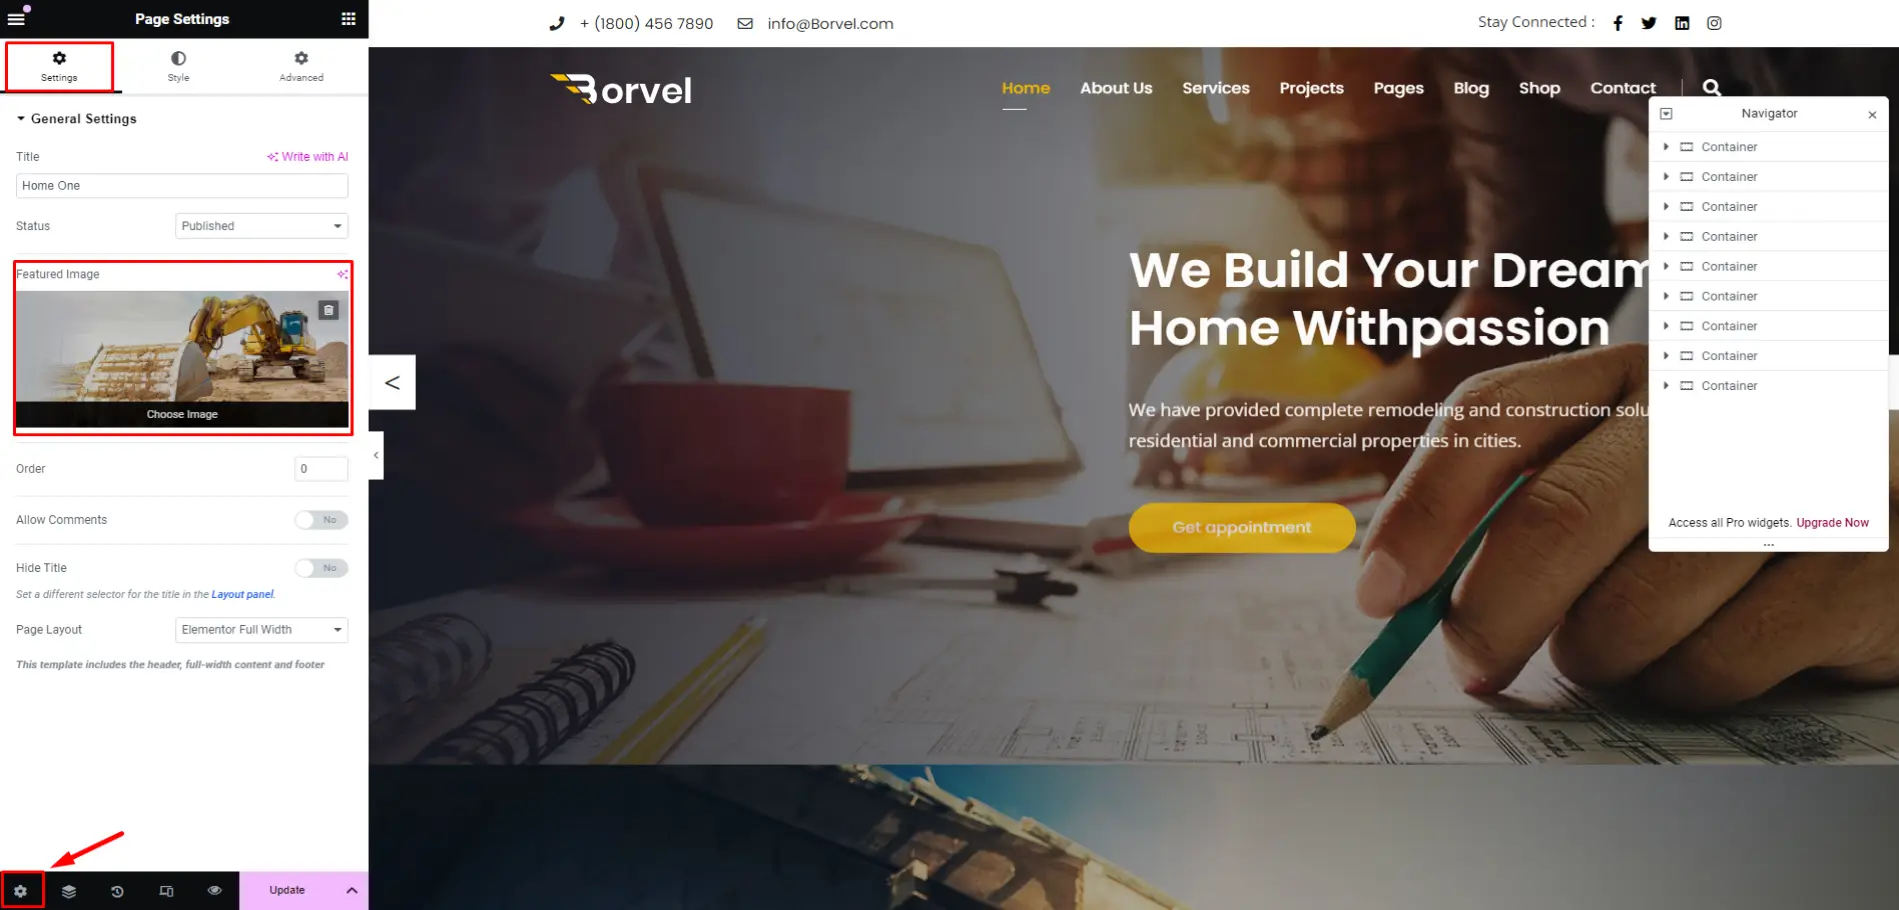
Another way is to add "featured image" is, open the post with elementor. Then goto left bottom corner and click "setting" icon. It will allow you to upload featured image.
Post Excerpt
Excerpts are used to trim long texts from blog post in a short form when blog lists are shown. It adds a "Read More..." button on the end of trimmed sentence. Most of the time, it is done
automatically, from themes. But you can insert your own excerpt too.
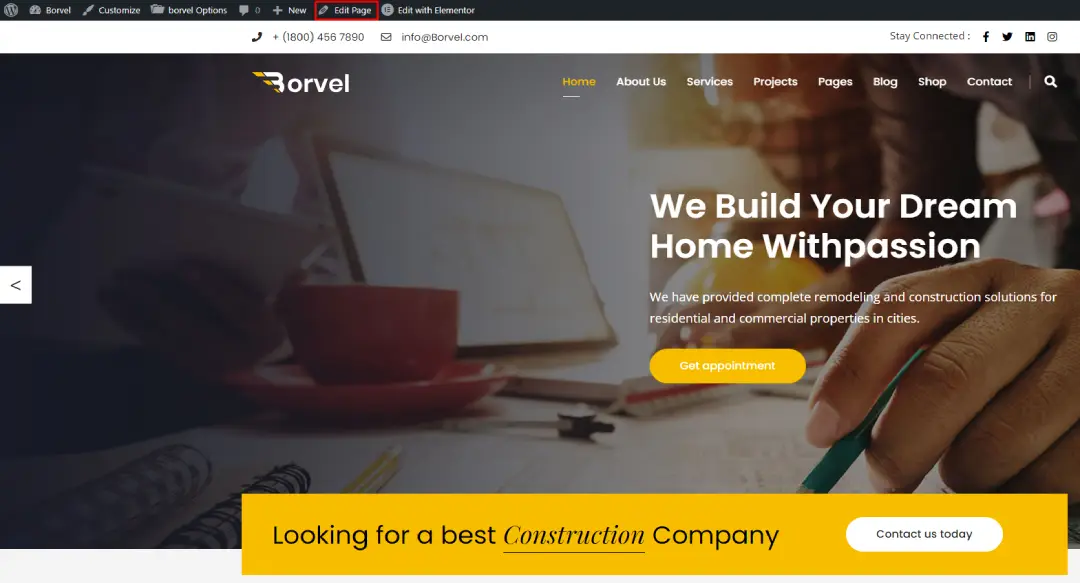
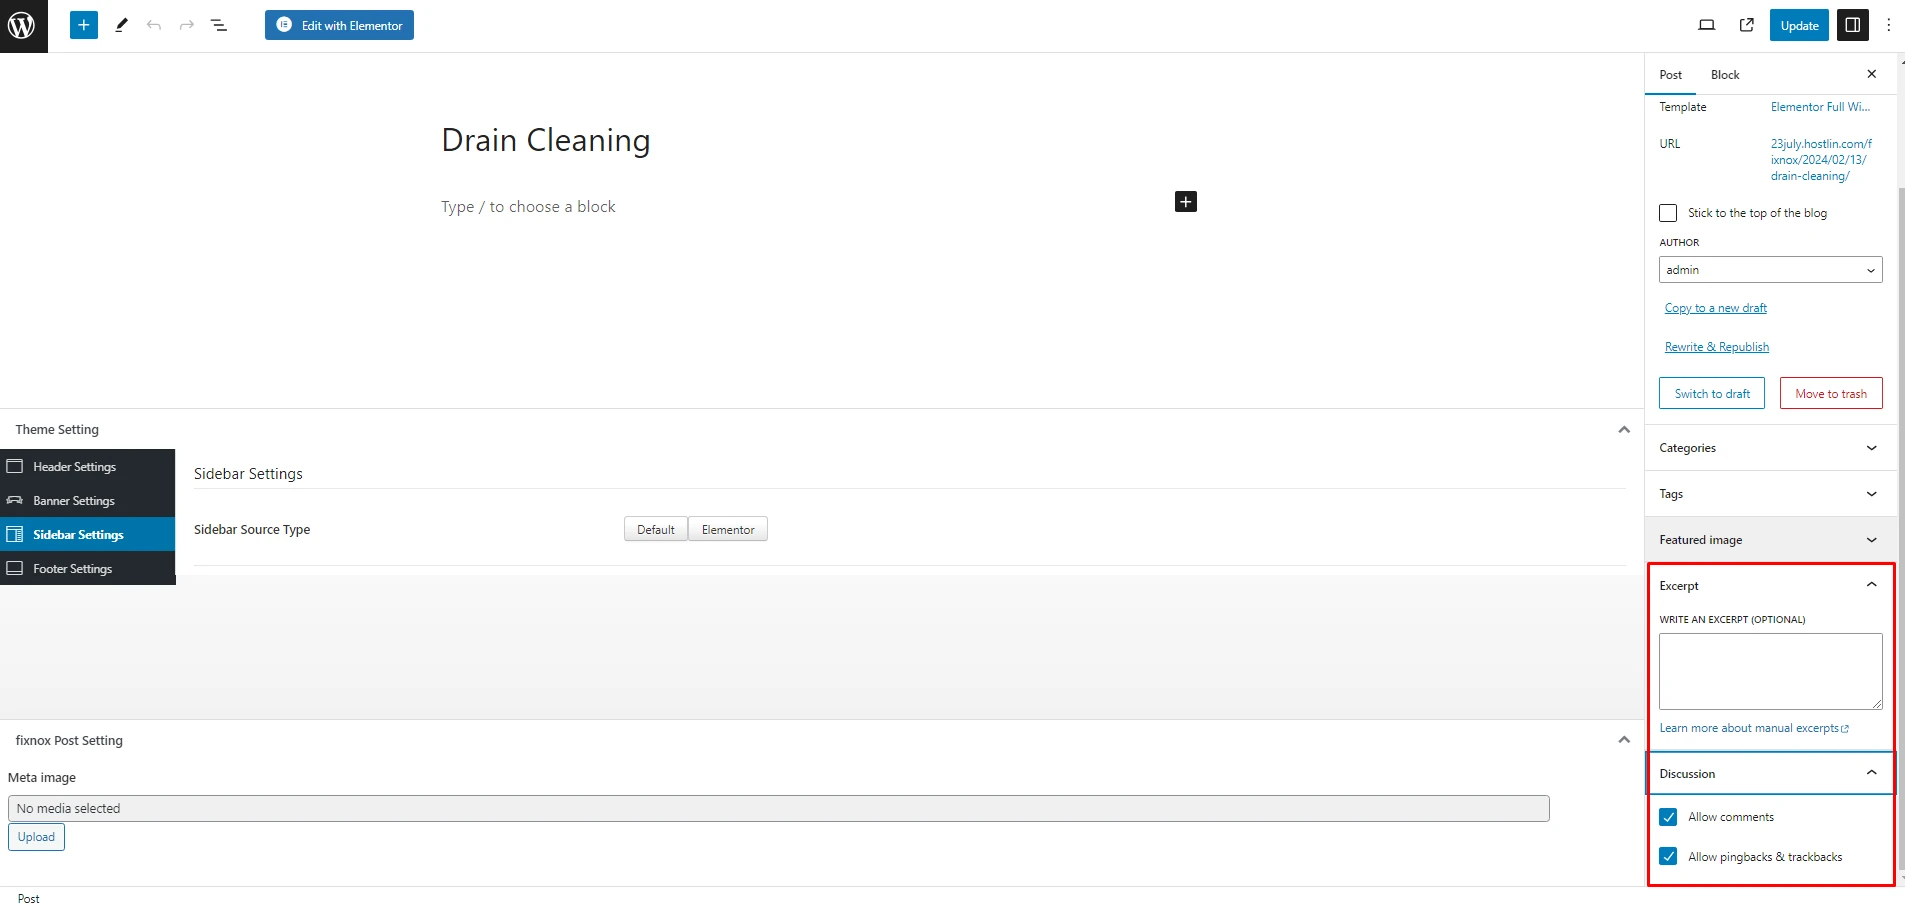
First way is to login into wordpress admin panel and go to any page, click "edit" on the top center
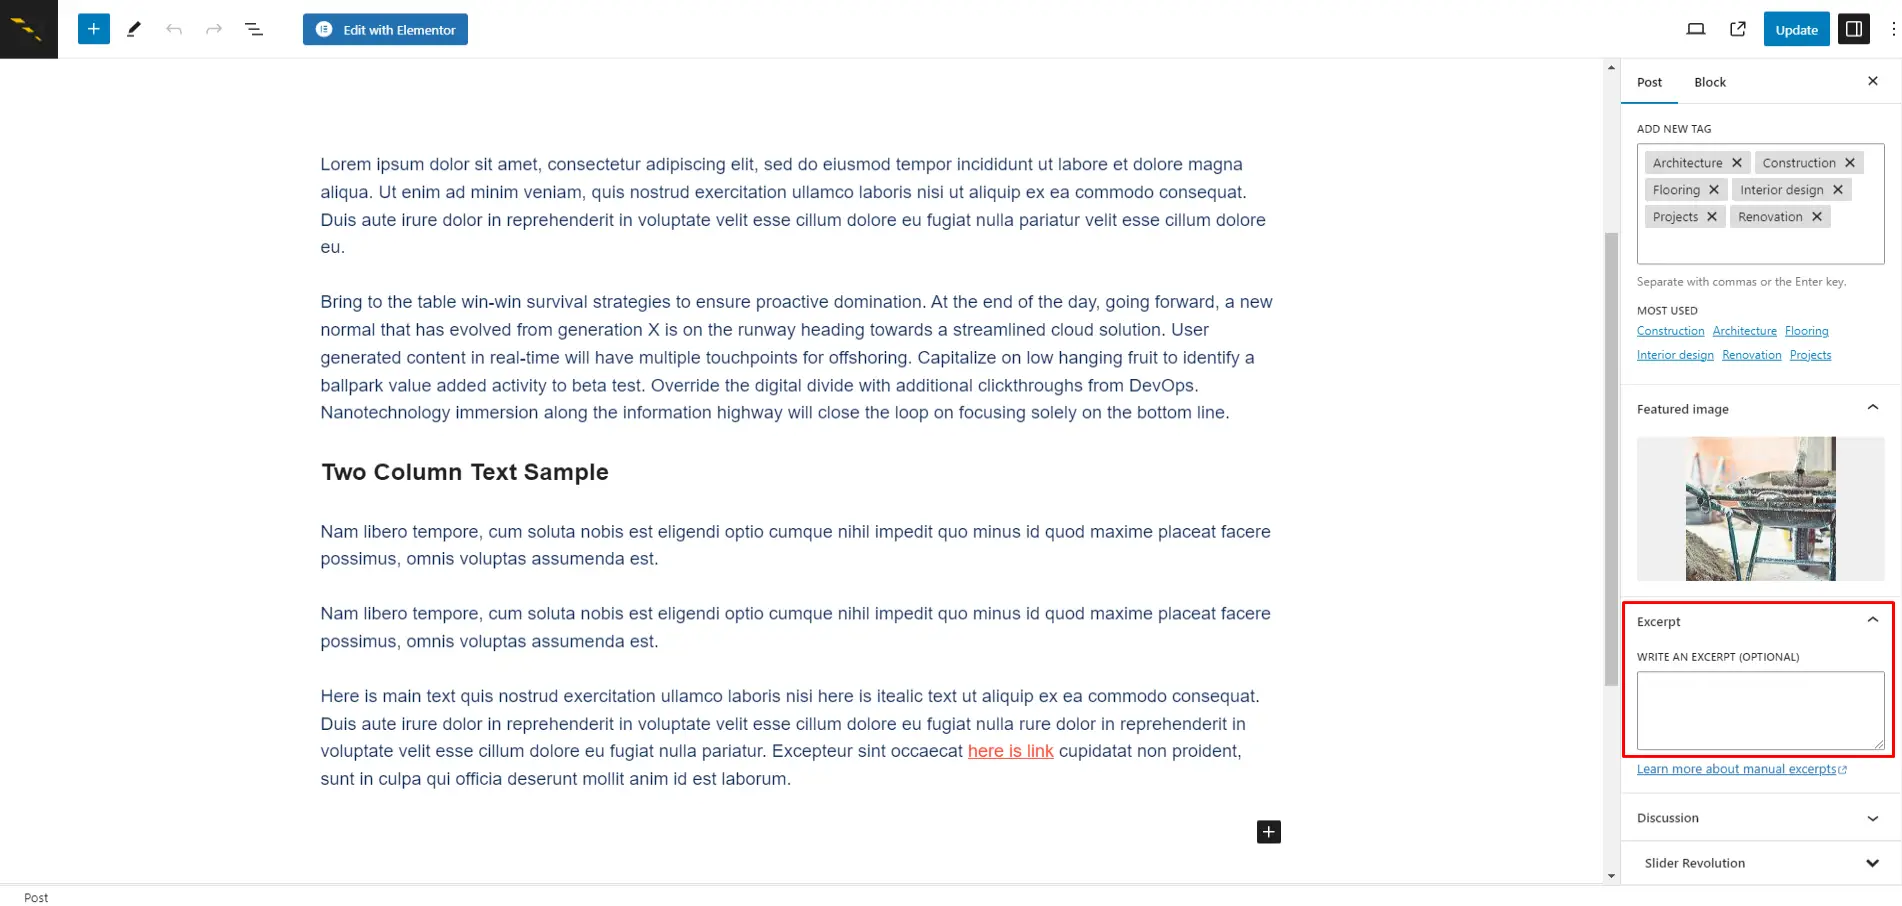
You will find "Excerpt" and put your custom Excerpt text there.
And second one is while editing any post with Elementor, go to the bottom left corner and click on the "Setting" icon. There you will find custom excert field.
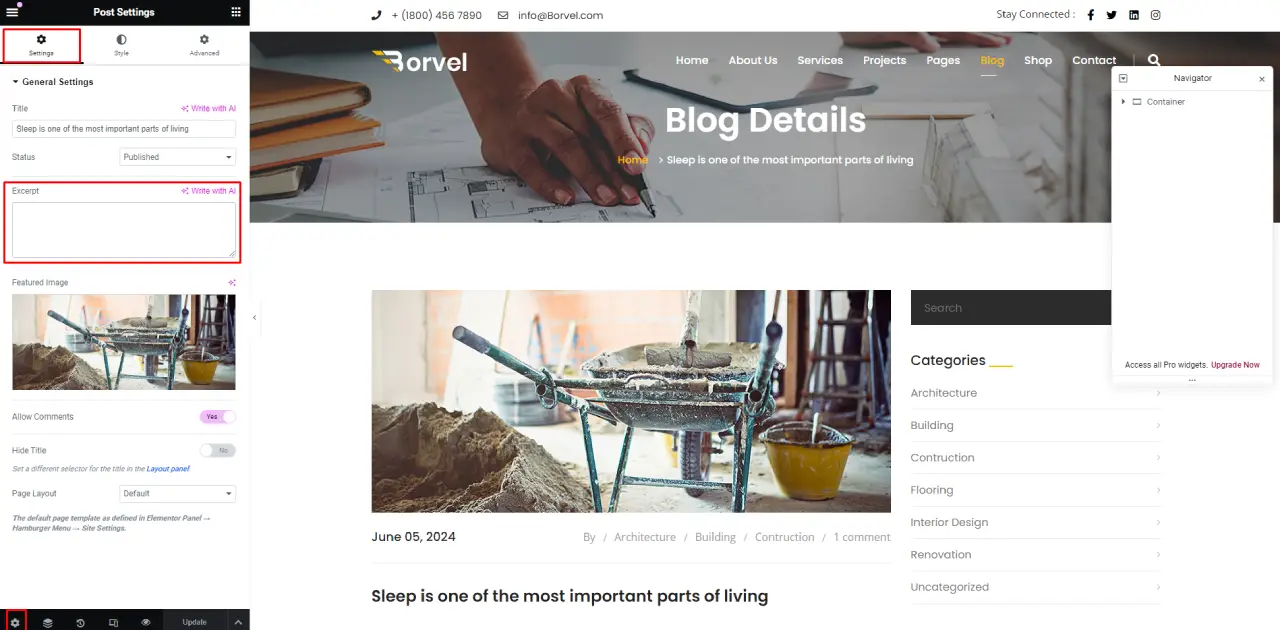
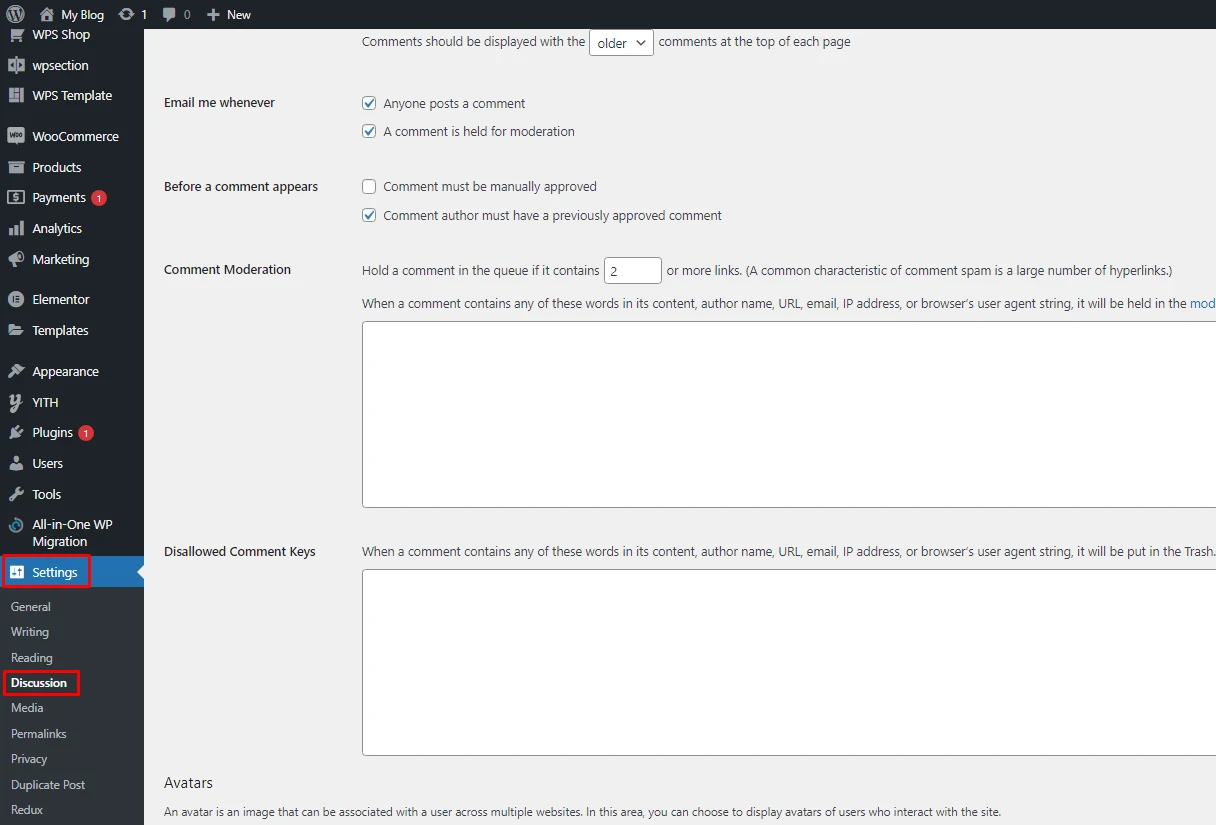
Comments
You can turn on/off comments for the whole side from here:
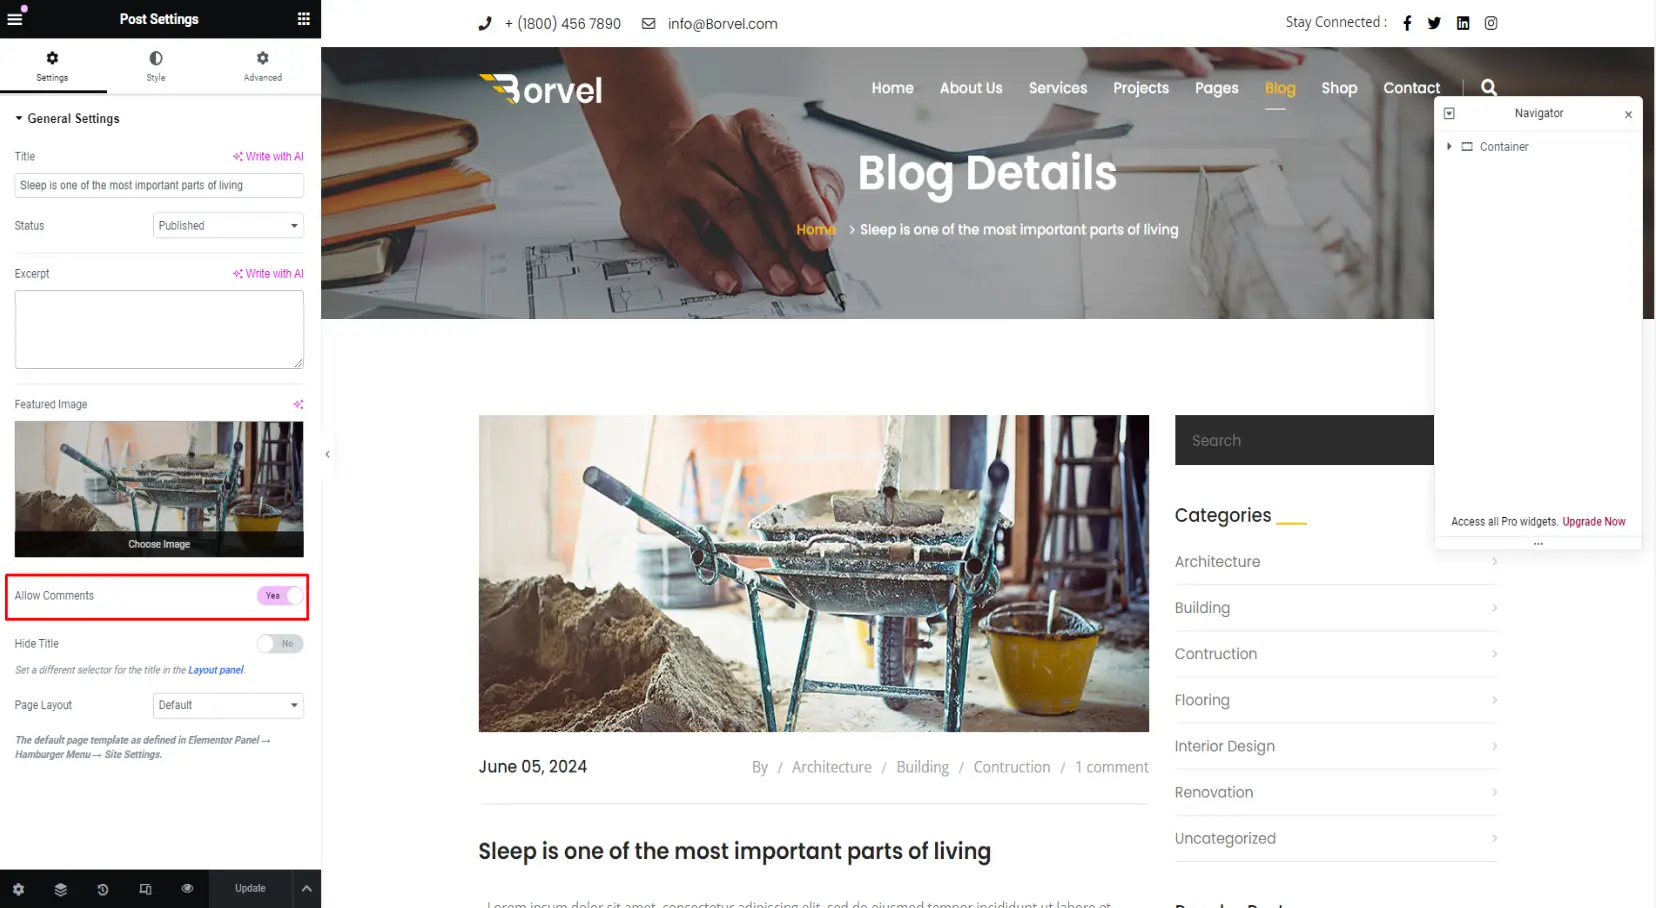
But you can turn on/off comments for posts only. It can be done on 2 way, First one is to hit "Edit Post" button and turn on/off comment from Discussion located on Bottom right side.
Another way is, while editing post with Elementor, go to bottom left, click Settings icon. You can turn on/off comment by activating "Allow Comments"
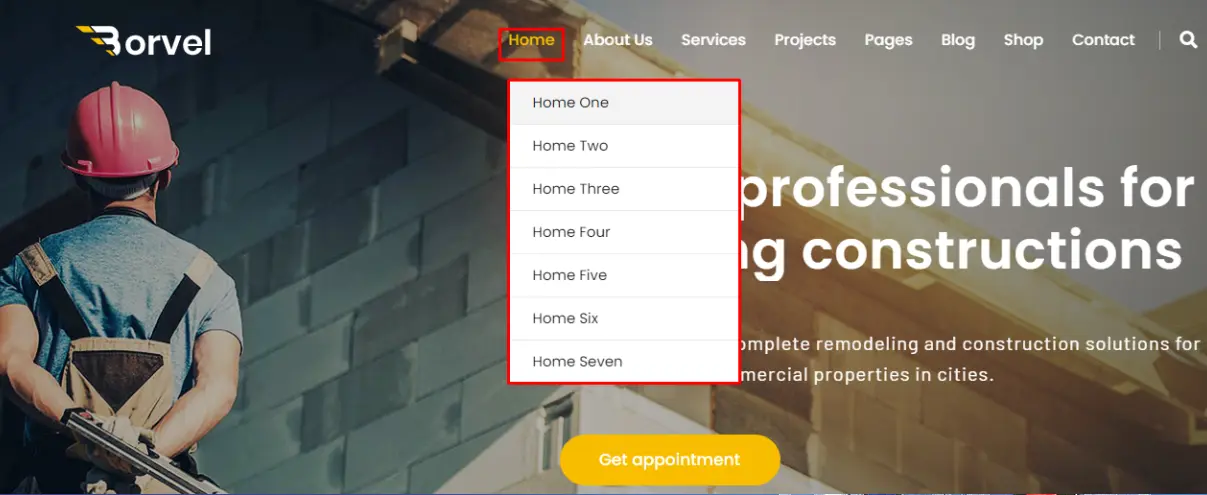
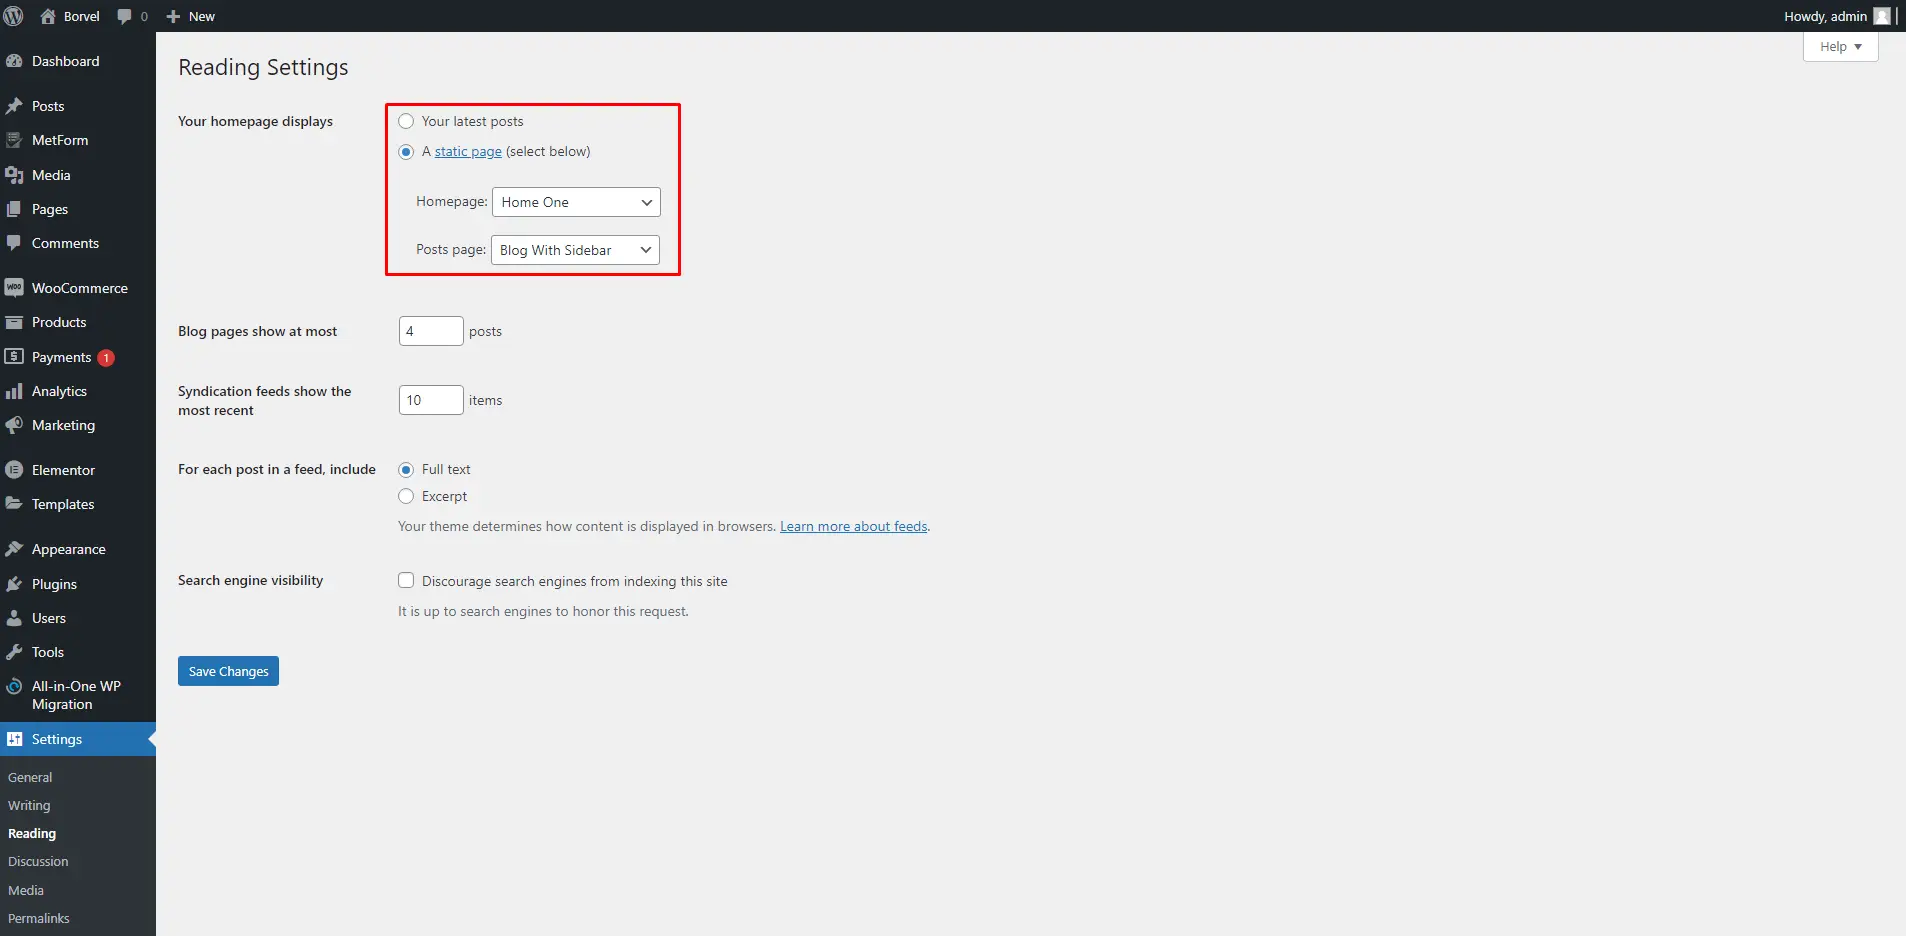
Home Page Setup
To set any page as Landing page, go to Settings > Readings > Your Homepage Setting > A Static Page and set the page you want to use as Homepage. Generally it is "Home One" but you can set other Homepages too.
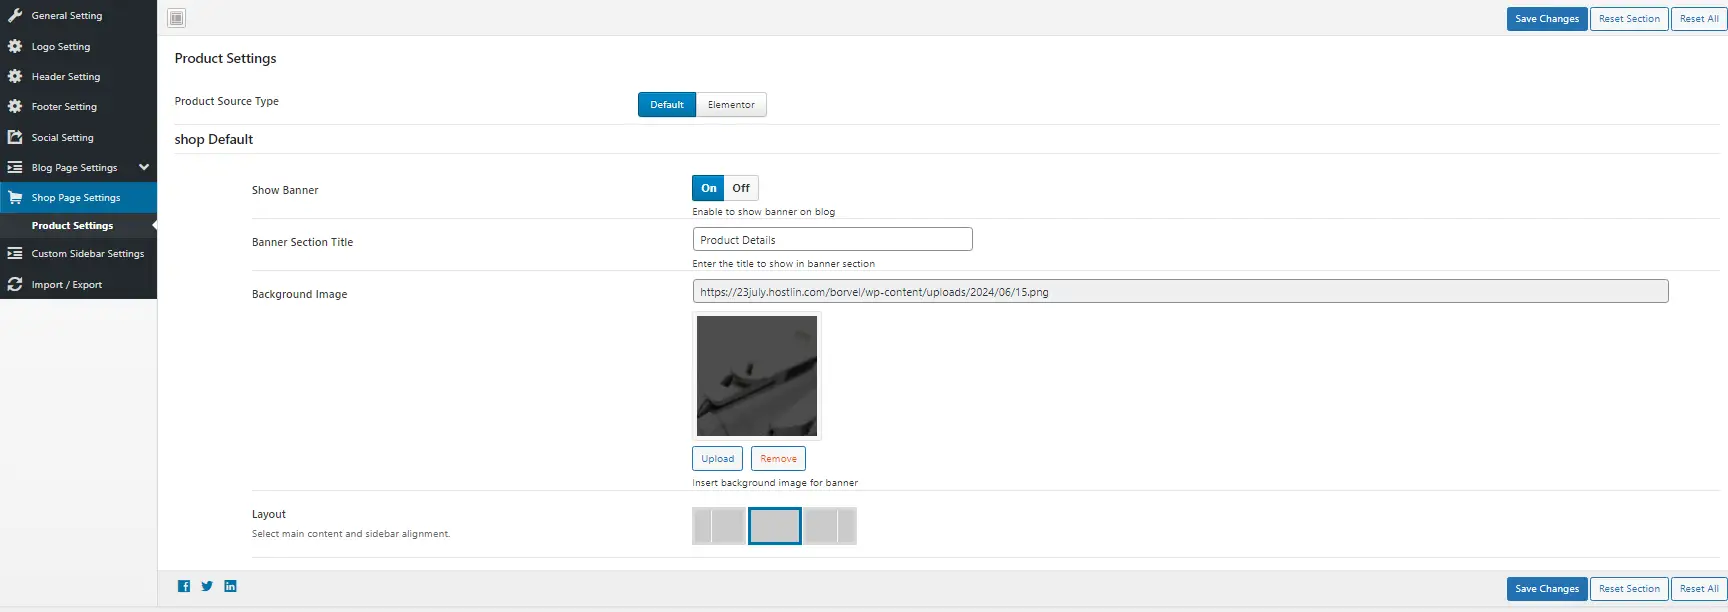
Product Page Settings
We have extended our theme to customize the Product page (Used on woocommerce) with Typography, Banner options, Layout options, Bread Crumb options. You can navigate to Product Page Settings from Appearance > Theme Options > Shop & Product > Product Page Settings.
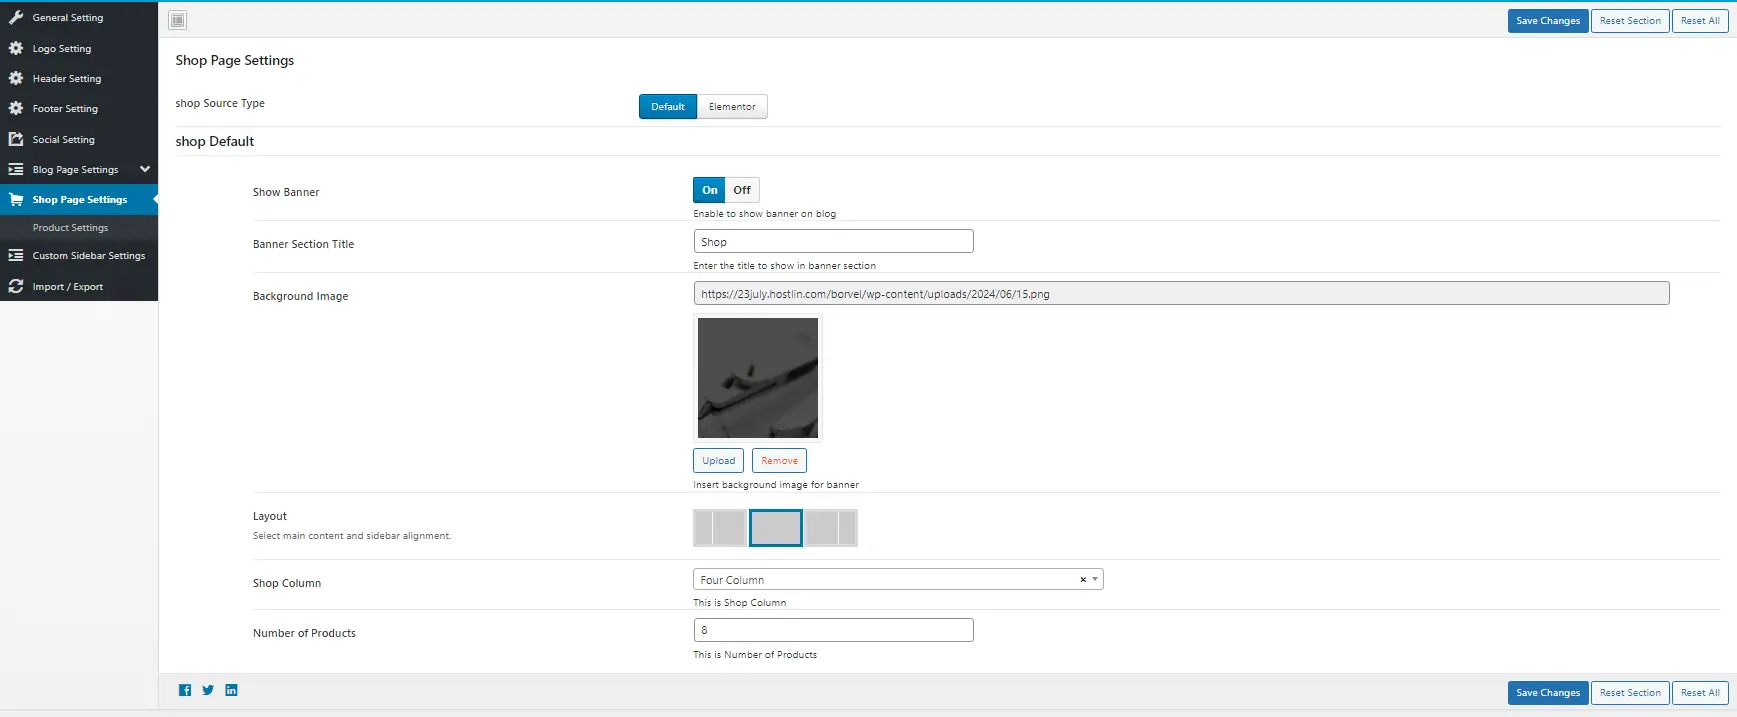
Shop Page Settings
This area is similar to previous area. You can add title image for product page from here.
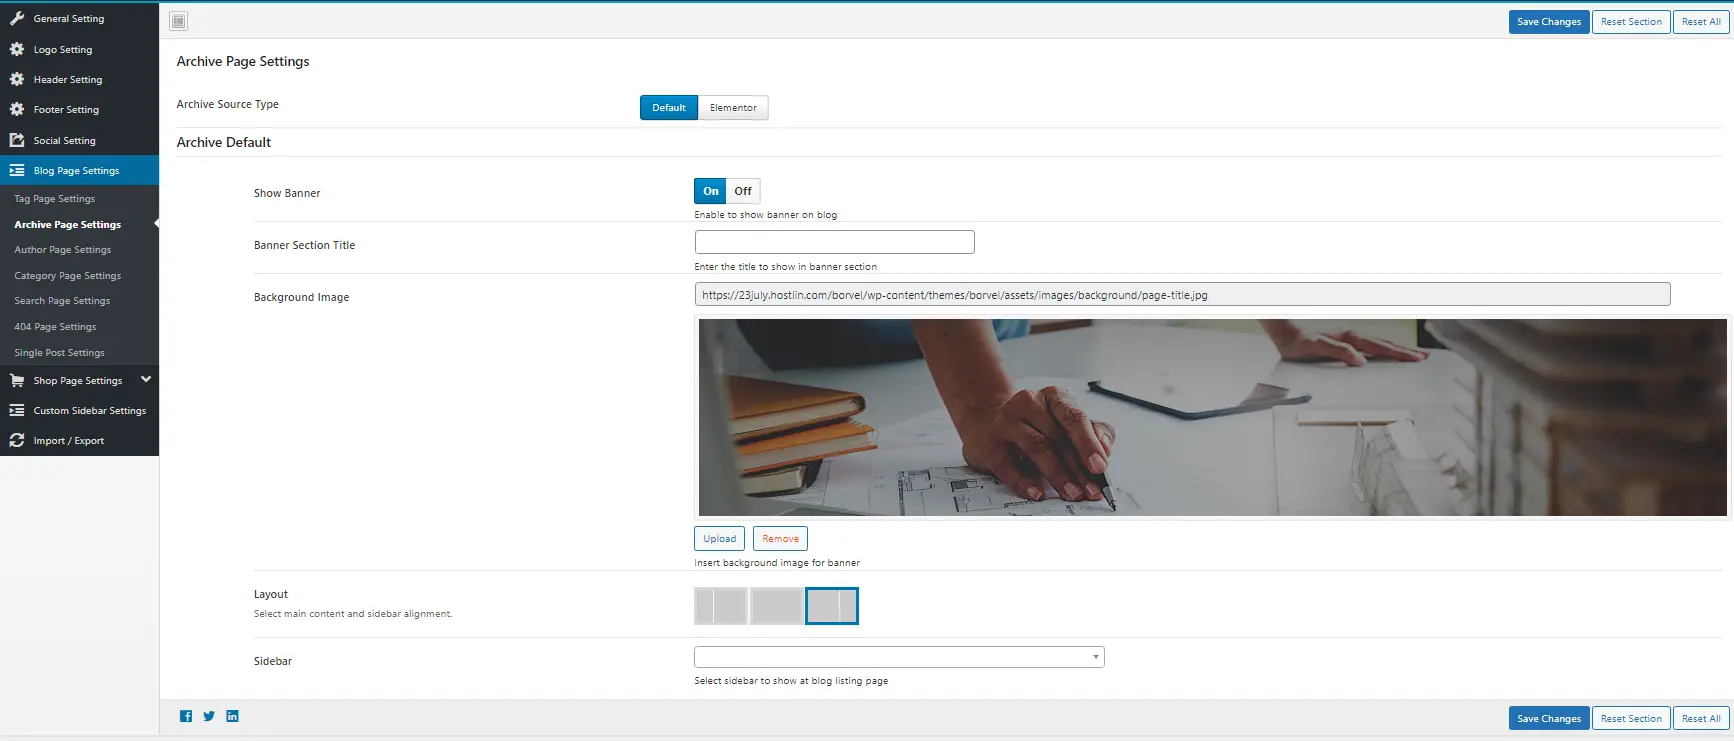
Archieve Page
As like post/pages, this pages also have the Title, Background image, Sidebar Layout options. To customize go to Appearance > Theme Options > Blog & Archive Settings > Archive Page Settings
Logo, Favicon
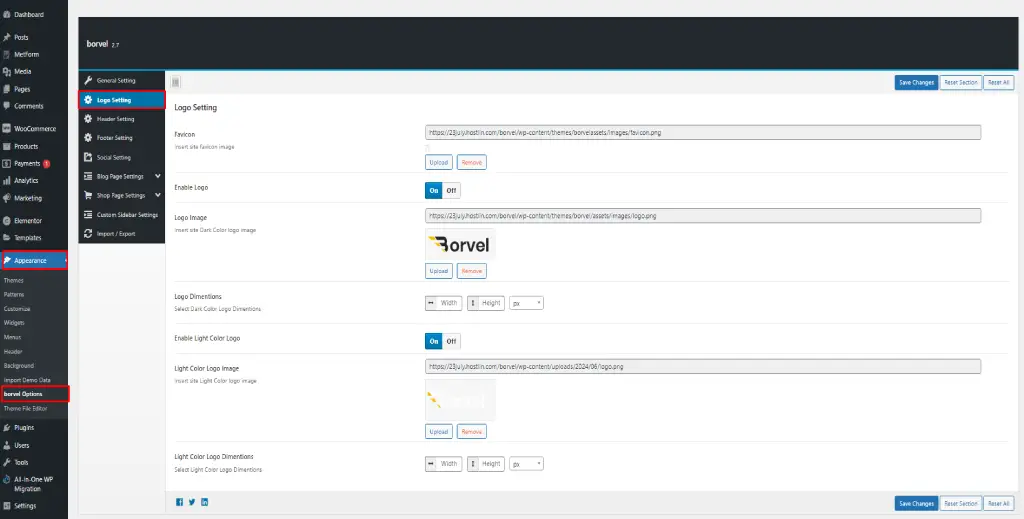
To change site logo, mobile mode logo, Go to Appearance > Theme Options > Logo Setting and you will find Main Logo, Secondary Logo upload options with dimensions. You will find Favicon upload options too. Though you can work with any name, if you have SEO purpose, you should name the PNG file as "favicon". So you should try with favicon.webp or favicon.png and standard sizes are 16X16, 32X32, 64X64, 128X128, 180X180 pixels and 32X32 is the most used dimension.
Preloader
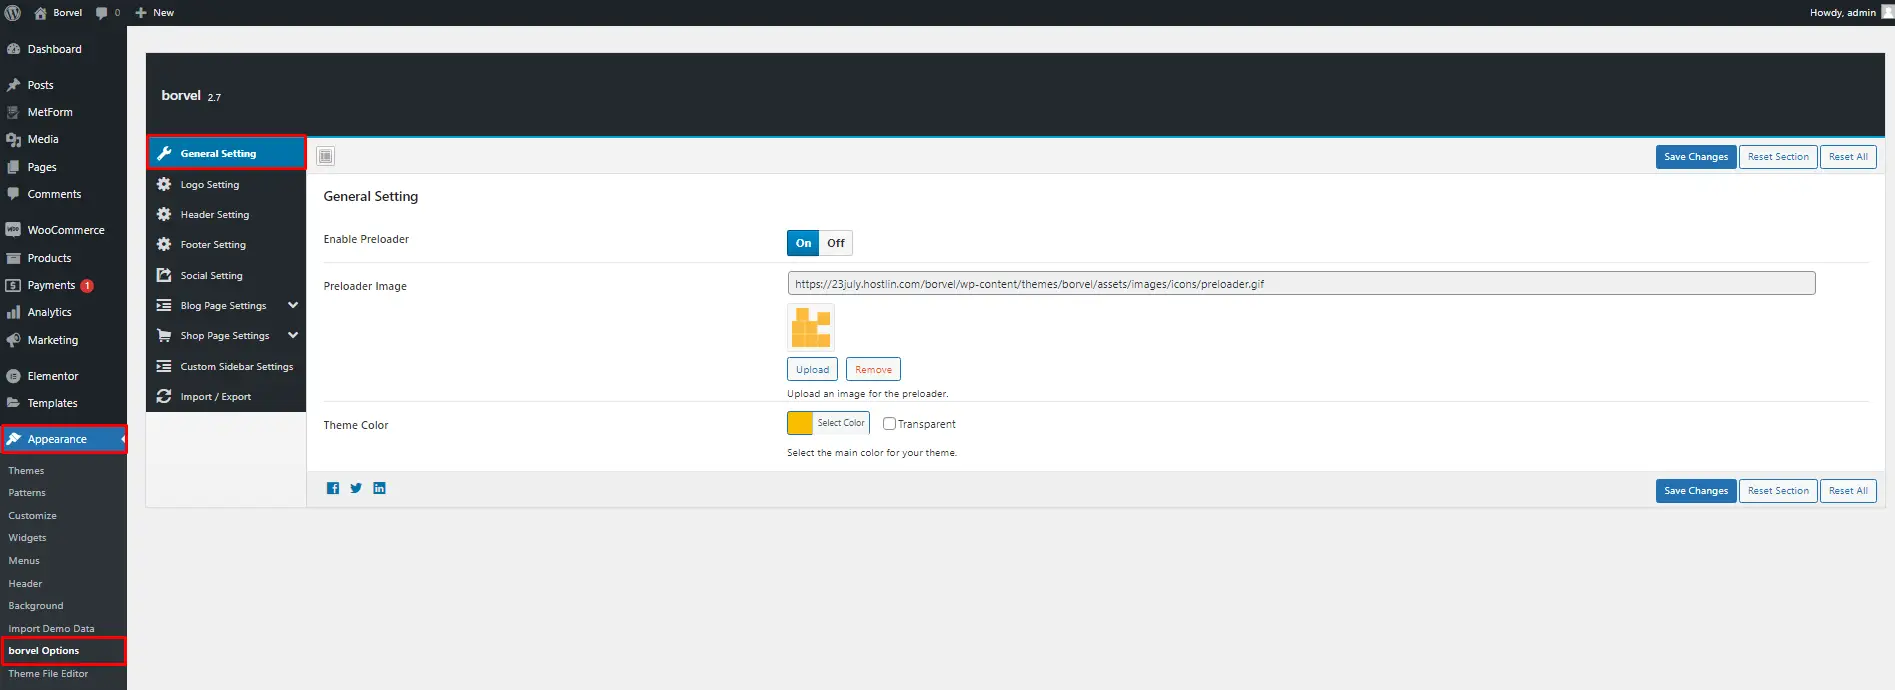
You can set the preloader image from Appearance > Theme Options > General Settings. Best practice is to use optimized size PNG or GIF images.
Contact us forms or similar contact forms used on the theme use a third party plugin "Met form" to send data to user email. Make sure your hosting
account has active email account which is capable of send / recieve emails, otherwise you may face issues.
The easiest method is to go to the page where the contact form is. Then find out the number of the contact form as shown on the video. As we know the
number which is used on this from, now go back to the dashboard and navigate to Metform > Forms and edit that form. Now go to the Notification tab and
turn on "Notification Mail to admin" and write your Email on "Email To". That's all.
Thank You
Thank you again for choosing our Theme, enjoy it and give us your valuable Review & Rating.

Select Color
Modes

light

dark
Backgrounds

Default

Bg-1

Bg-2

Bg-3

Bg-4

Bg-5
Box Design
Default
Box-1
Box-2
Box-3